Continue to Site

Welcome to EDAboard.com

Welcome to our site! EDAboard.com is an international Electronics Discussion Forum focused on EDA software, circuits, schematics, books, theory, papers, asic, pld, 8051, DSP, Network, RF, Analog Design, PCB, Service Manuals... and a whole lot more! To participate you need to register. Registration is free. Click here to register now.

Sine wave constant current amplifier

Status
Not open for further replies.

slanina

Junior Member level 2
Joined
Sep 19, 2013
Messages
24
Helped
1
Reputation
2
Reaction score
1
Trophy points
3
Activity points
228
I am experimenting with electro magnets and I am trying to feed AC 1A current into a small electromagnet.
Due to the magnet size (small) and current of 1A wire would be about ~1mm in diameter which would make its resistance negliglible since its lenght won't be much (~10cm/4in in total).

What would be the best way to amplify a 5kHz - 20kHz AC sine wave (from DDS, or sine-wave oscillator or lab function generator) to provide constant current of 1A on such a small load. As for Vpp, it would be nice if it can be adjustable, but I could live with ~5 Vpp.

I have looked at various circuits and I can find constant current sources circuits. But I need to amplify input signal *and* provide constant current. I guess there should also be a diode to prevent back EMF.
 

By constant current do you mean regulating the current to 1A RMS? If you regulate the current, then you can't simultaneous adjust the output voltage. The output voltage would be determined by the output current and the magnet impedance at the frequency of operation. For that you need to now the inductance of the magnet.
 

By constant current do you mean regulating the current to 1A RMS? If you regulate the current, then you can't simultaneous adjust the output voltage. The output voltage would be determined by the output current and the magnet impedance at the frequency of operation. For that you need to now the inductance of the magnet.

Actually I care only about the current to be 1A and signal to be fed to the coil will be sine wave in the range of 5-20kHz.

For 30 turns, 1mm dia wire on a 1 mm core (complete diameter of coil is then 3mm) calculations give ~0.254 uH.

I did FEM simulations and having about 30 turns on 1mm iron core with 1A at that frequency range gives me good results in terms of magnetic field.

So I would like to build a simple circuit that would feed such amount of current and sine wave. Sine wave part I plan to use a AD9850 DDS module and connect it to mbed.
 

You can use some integrated audio amplifier like TDAxxxx. You can set constant current manualy with input signal level, if the load will not change.
 

You can use some integrated audio amplifier like TDAxxxx. You can set constant current manualy with input signal level, if the load will not change.

Could I use something like this:

**broken link removed**

I did a TINA simulation with +12 and -12V power supply ( I would take that from a computer ATX power supply), and when I feed sine wave in the simulation I get ~1.75A for a 0.01-1 ohm load.

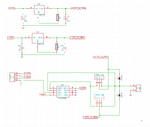
Simulation schematics is attached:

Amplifier.png

Would this work?

Or maybe class AB amplifier chips would be simpler (less components) than class D.

EDIT: What would be the best way to add current limiting to 1A no matter if there is coil connected or short circuit? Since my coils would be nearly 0 resistance. I guess I would also need 2 diodes to protect power supply from coil when disconnecting.
 
Last edited:

Have a look at using a resistor in series with your Load.

From the voltage generated across this resistor you can have what is in effect 'Current feedback' such that as your frequency changes, the reactance of your coil is compensated for directly.

Mik
 
  • Like
Reactions: FvM

    FvM

    Points: 2
    Helpful Answer Positive Rating
Have a look at using a resistor in series with your Load.

From the voltage generated across this resistor you can have what is in effect 'Current feedback' such that as your frequency changes, the reactance of your coil is compensated for directly.

Mik

Where would I connect this voltage across resistor?

- - - Updated - - -

I had an idea ->

(1) I would use computer ATX power supply that has +12V, GND and -12V on it and can provide lots of current so that should not be an issue.
(2) I would use same circuit I have posted with TIP31 NPN and TIP32 PNP transistor and an OPAMP with negative feedback.
(3) I would feed the opamp with a 5kHz sine wave from the function generator.

I would use LM117 as an current source to connect to +12 and using 1.2ohm 2W resistor provide a 1A current source that would be connected to the NPN transistor.
I would use LM137 negative regulator also configured as 1A current source and connect to the PNP transistor.

Thus, the most load can take from the transistors is 1A of current since it is regulated by the LM117 and LM137 pair.

At the end I would have an AC current passing through the coil. It looks more as square wave than sine wave (since transistors act as switches), but I guess my electromagnet would work.

I would also add 1N5400 diode from output to +12V and one from output to -12V to protect from the inductive load (coil).

What do you think?
 

schem.png

Attached image of schematics is what I had in mind.
For LM117 and LM137 regulators R is 1.2 ohm @ 2W - as per datasheet to give 1A regulated current source.
Diode is 1N5400.
Rest is visible.

Did I forget something or is it OK?
 

i am about to build it so bumping it for comments, if any. :)
 

To generate a constant 1Adc you need the 1.2 ohm resistors in series with the LM317 Vout and the ADJ pin connected to the output side of the resistor. But the LM317 will likely not respond fast enough to give an accurate constant current much above a few kHz.

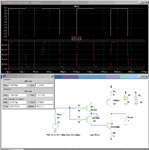
Below is a relatively simple circuit that will generate a constant current (current-limited) square-wave. The value of resistors R1 and R2, and V2 and V3 determine the output current. The voltages V2 and V3 can be adjusted to change the current over a limited range. The transistors are ones that were available as models in my simulation but other transistors can be substituted with similar specs.

Note that R1 and R2 will dissipate about 2.5W each so should be 5W resistors.

Constant Current.gif
 

Thanks. As a newbie in this - I have a question though - V2/V3 is +6V/-6V so 6V/5ohm = 1.2A even though simulation shows 1A.
And is it possible to drive D45H11 and ZTX1048A directly? Or it needs to be through other resistors, and 1K resistor there is I guess only to limit current to be 1mA?
 

The base-emitter drop of Q1 and Q2 and other losses reduce the voltage across the 5 ohm resistors. The actual current may vary some from the simulation due to various component tolerances so will need to tweak the power supply voltages if you want exactly 1A.

You can drive Q1 and Q2 directly but you need to drive them with separate out-of-phase signals. 0 to +6V for the Q2 base and 0 to -6V for the Q1 base.

The 1k resistor is to limit the base-emitter current. This is always required for a common-emitter amplifier since the base-emitter impedance is very low (looks like a forward biased diode). It's not required for an emitter follower circuit since the base current is limited by the circuit itself.

If you want to simulate the circuit and try circuit variations you can download a free copy of LTspice, which I use, from Linear Technology.
 

Thanks.

I use TINA from Texas Instruments for simulation.

To understand this correctly:

If I have a square signal going from -5V, across 0 to +5V and then back, I could drive Q1 and Q2 directly since when Q1 would conduct Q2 would not and the opposite?

But since you have a square signal going from 0 to 5V and back, you used Q3 and Q4 to split them in phase, so when Q1 conducts Q2 would not and the opposite?

I can see the results in the simulation; but not sure how it works;
 

The straightforward method to make a constant current amplifier has been described by audiomik in post #6, unfortunately it has been ignored yet.

The only limitation is that the load must be suited for floating connection between amplifier output and current shunt, usually no problem. As another point, an inductive load might require additional loop compensation to achieve stability.

I didn't ignore it. I just do not understand where would I feed back this voltage across the resistor?

Also, in my application there is a fixed frequency; I may use for example 5kHz or 50kHz but as long as the circuit is working I will not change the frequency. Exact frequency I will know after some experimentation but basically the only purpose of this circuit is to provide 1A AC current to a coil which would then produce a magnetic field. Using magnetometer I will measure magnetic field. I need to limit the current to 1A no matter if coil is 0.01 ohm, 1 ohm or 2 ohm. Because I may use 1mm dia wire or 0.6mm dia wire. Obviously if I use 1mm wire, then resistance would be very high so if I just connect it to the power supply without current limiting I would have lots of current passing through it and it would melt or basically be short circuit to the power supply.
 

That's why a constant current amplifier is suitable.

The connection is rather trivial, you really could have guessed it from the brief comment in post #6.

amplifier output - load - shunt - ground

and load-shunt node to inverting amplifier input.

To reproduce 20 kHz sine, you can use

- a power OP (or audio amp IC)
- a high bandwidth OP with a class B current booster (as shown in post #5)
bandwidth margin will be traded against crossover distortions
- a medium bandwidth OP with class AB current booster

But in my post #5 circuit I do have negative feedback going back to the amplifier (-) input. Schematics is from TINA spice simulation and coil is 0.25uH with 0.01 ohm resistance. This coil inductance is calculated by the formula for the single layer coil which I plan to make. Just there is no resistor.

I am computer programmer by education and work experience and do embedded software development. Just in this case I need some circuit to interface to the physical world; then I have 2-3 months of software work to finish this....
So bear with me :) If we talk logic circuits, FPGA/CPLD and stuff - I am OK; but analog......I am not at home much.
 

Thanks.

I use TINA from Texas Instruments for simulation.

To understand this correctly:

If I have a square signal going from -5V, across 0 to +5V and then back, I could drive Q1 and Q2 directly since when Q1 would conduct Q2 would not and the opposite?

But since you have a square signal going from 0 to 5V and back, you used Q3 and Q4 to split them in phase, so when Q1 conducts Q2 would not and the opposite?

I can see the results in the simulation; but not sure how it works;
If you look at the results of your simulation without Q3 and Q4, and with Q1 and Q2 tied to a single signal source, you will see that the base current increases greatly. That is because the base-collector junctions are being forward biased. Thus, for example, when the the voltage goes to +5V the base-collector junction of Q1 becomes forward biased and acts like a diode, since the output voltage is less than a volt, conducting base current directly to the load, limited only by the source resistance. That is why you need to drive Q1 and Q2 from separate sources, and why I added Q3 and Q4.

Remember that the base-emitter and base-collector junctions both look like diodes. Normally the base-emitter junction is forward biased and the base-collector junction is reverse biased. But if you forward bias the base-collector junction it will also conduct current directly from the base.
 

But in my post #5 circuit I do have negative feedback going back to the amplifier (-) input. Schematics is from TINA spice simulation and coil is 0.25uH with 0.01 ohm resistance. This coil inductance is calculated by the formula for the single layer coil which I plan to make. Just there is no resistor.

But you can imagine a shunt resistor (say 1 ohm) to sense the current?

I am computer programmer by education and work experience and do embedded software development. Just in this case I need some circuit to interface to the physical world; then I have 2-3 months of software work to finish this....
So bear with me :) If we talk logic circuits, FPGA/CPLD and stuff - I am OK; but analog......I am not at home much.
There should be someone like a supervisor to help with the prerequisites of your software work. (Hopefully it's not over his head as well)
 

The straightforward method to make a constant current amplifier has been described by audiomik in post #6, unfortunately it has been ignored yet.

The only limitation is that the load must be suited for floating connection between amplifier output and current shunt, usually no problem. As another point, an inductive load might require additional loop compensation to achieve stability.
It may be straightforward but not necessary simple or easily made stable with an inductive load. Since he stated that a square-wave would be okay, I showed a simple circuit that generates a current limited output and is stable with an arbitrary inductive load.
 

Status
Not open for further replies.

Similar threads

Part and Inventory Search

Welcome to EDABoard.com

Sponsor

Back
Top