Continue to Site

Welcome to EDAboard.com

Welcome to our site! EDAboard.com is an international Electronics Discussion Forum focused on EDA software, circuits, schematics, books, theory, papers, asic, pld, 8051, DSP, Network, RF, Analog Design, PCB, Service Manuals... and a whole lot more! To participate you need to register. Registration is free. Click here to register now.

Delayed switch for old mobile phone

Status
Not open for further replies.

pmj

Newbie level 5
Newbie level 5
Joined
Mar 8, 2015
Messages
9
Helped
0
Reputation
0
Reaction score
0
Trophy points
1
Activity points
64
I have an old mobile phone with dead battery and broken power button. I can start the phone by short circuiting the power button pads for little over two seconds. Voltage between the pads is 1,7 volts.

I would like to have some automation for that, I want put my phone back in covers and want it to start whenever I plug the power source on the wall. What components I need that short circuits the pads for 2 seconds once voltage available?

Thanks.
 

It depends on how the power button operates. Bear in mind it isn't a switch to actually connect or disconnect the power, it will work more like a 'standby' button on a TV, putting it to sleep apart from the circuit monitoring for it being pressed again.

If it is part of a key matrix, you need an analog switch and timer circuit, it isn't complicated but you wont be able to build it small enough to fit inside the phone. If it works as a single switch you might be able to simply wire a capacitor across the pads. The capacitor would look like a short circuit while it charges so from a 'cold start' when you power up, it would appear to hold the switch closed. Which kind of switch it is depends on the type of phone and even if you know the make and model number it would not help, you need the schematic for it so see how the switch is wired into the other circuitry.

Brian.
 

Yes, and it works only if the press lasts over 2 seconds. Would any capacitor work here? Seen somewhere they put capacitor on pc start button, pc starts once plugged on the wall. They told that it conducts only short time, the needed time.
 

The 'kick start' capacitor in a PC power supply is something quite different I'm afraid.

The problem with the phone is it depends on how the button is connected. Most of the buttons on a phone are wired in a matrix, they are electrically arranged in a grid (nothing to do with the layout as you see it on the phone) and the grid is scanned one key at a time until one is pressed. At that point it will link one row to one column and the phone processor looks at which row and column to work out which button it was. If you simply connect a capacitor across a scanned keypad it will charge and discharge continuously, giving the impression the button is permanently stuck down. Not only does this not achieve what you want, it also blocks all the other buttons from working.

If the 'on' button is NOT part of a matrix you stand a chance of it working. The next thing you need to know is what value of capacitor is needed. That depends on how quickly it charges up, more current lets it charge faster and hence make the switch appear to be released sooner. You can use trial and error with different values if you have them to hand or if you have a test meter you can measure the current to get a rough idea of a good value to try. If you can, connect a meter on the DC current range across the pads and see what it measures, I would expect something in the region of 0.1mA (= 100uA) but the actual value depends on the phone design. There is a potential pitfall you might need to work around: when you switch the phone off you have to do it by removing the power but there will still be a charge held in the capacitor. You might need an additional component, a diode, to ensure it discharges quickly enough not to cause damage. Lets cross that bridge when we get to it.

Brian.
 

Thanks for good answer and explaining the matrix. I did the metering and got 16 uA.
 

OK, then it's worth a try. Connecting a capacitor across the pads might work, 16uA is quite small and the 1.7V you measured suggests the processor connected to the pads runs from a 1.8V supply, it's a standard voltage and you lose a fraction by measuring it.

If it isn't in a matrix, the capacitor will start charging as soon as the power is applied, what we don't know is at what threshold the voltage is deemed to be low (switch closed) and high (switch open). The delay has to be long enough that the voltage is kept in the low state for at least two seconds. To achieve a time constant (the time for the capacitor to reach ~2/3 charge) of 2 seconds the value has to be 19uF. As we do not know the exact charge needed and it should be safe to make it longer than necessary, I suggest you try a standard value of 22uF first. If that doesn't work, try 33uF instead. Use the lowest value that works reliably to limit the charge that will flow backwards into the circuit when the power is cut. The voltage rating can be anything from 2V upwards. Use your meter to see which pad is positive and negative, the capcaitors you will find with those values are polarized and you should connect their positive end to the positive pad.

Brian.
 

It works! Once.. :) Do I need to discharge the capacitor some how? It's 22 uF 50V electrolytic capacitor. Can I ask how did you calculate the correct capacitor for this, so maybe I can do it by myself next time? :)
 

That's what I was afraid of. You need a method to discharge the capacitor immediately when the power is removed or the existing charge will stop it working again. The normal solution is to add a small signal diode (1N4148 or equivalent) from the positive end of the capacitor to the supply feeding it. The diode will only conduct when it's anode end is at a higher voltage than it's cathode end so if you wire it with cathode to the capacitor and anode to the supply it will normally not conduct at all but when the supply is removed, falling to zero, it dumps the charge into the supply line. You won't notice the extra millisecond as it keeps the phone running but when the charge is removed it is ready for use again.

The problem is where to find the supply line. Ideally it will be the supply to the microprocessor which is (I guess) 1.8V. If you use the external supply there is a possibility it will not drop low enough, fast enough, to discharge the capacitor. It is worth a try though. Get hold of a small diode and wire it's anode to the positive end of the capacitor and it's cathode (end marked + or with a band around it) to the positive of the incoming supply. Make sure you wire it the right way around or you will kill the phone instantly!

The 'time constant' of the capacitor is calculated with T=CR where T is in seconds, C is in Farads and R is the resistor in series with the capacitor and the supply feeding it. From the voltage of 1.7V and 16uA you measured, the resistance works out at ~106K Ohms so with that as the R value and knowing you needed 2 seconds, I calculated C. As I pointed out, there is a degree of uncertainty involved, as the capcitor charges from 0V up to 1.7V there is a particular voltage, which is unknown without the processor data sheet, when it stops being seens as a logic low and starts being seen as logic high. Consequently, it's better to err on the side of a larger capacitor than a smaller one. The larger value increases the risk of it holding the charge after switch off as you observed though.

Brian.
 

I tried to connect diode IN4007 anode to capacitor positive and cathode to charger connector positive voltage (charger gives 5,2 V). But no luck. If I short capacitor positive to charger connector neg/ground (charger disconnected), then it will start next time powered. How to proceed :F
 

OK, I 'half' expected that might happen. The diode conducts when the charger voltage drops below 0.6V but in practise the phone probably stops drawing current when the voltage is above that and hence the charger voltage stops dropping and doesn't go low enough. If you disconnect the charger and measure the voltage it is producing you will probably find it hasn't gone below 0.6V, hence the diode didn't conduct.

There's a simple but inefficient solution and a more technical but also efficient one. They are:

1. Simple solution: you want the voltage from the charger to go to zero when it is disconnected (from the wall). The phone alone stops drawing enough current from it to fully drop it's output to zero, letting the diode you added do it's job so you can add a further load on the charger to help drop the voltage. Keep the diode connected as it is and add a 470 Ohm resistor directly across the output of the charger. It will draw about 10mA extra which isn't much but will help to get that voltage down quickly when you unplug it.

2. More complicated solution: Remove the diode and add a small PNP transistor across the capacitor. Its emitter pin goes to the + of the capacitor and it's collector pin goes to the negative side (ground). From the base pin, wire two resistors, the first is 10K and goes to the collector pin, the second is 33K and it goes to the charger output. The idea is the resistor values hold the transistor so it is 'just' not conducting and so it plays no part in normal operation. When the charger voltage drops, it makes the transistor conduct and that pulls the charge from the capacitor. This method doesn't waste the 10mA current but obviously needs a little more construction work.

I would try method 1 first and see if it is sufficient before trying method 2.

Brian.
 

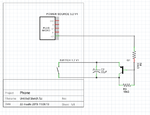
Could you check if I understood the option 2. correctly:
Untitled picture.png

I happen to have this kind of leftover, can I use this in this case? https://pdf1.alldatasheet.com/datasheet-pdf/view/85016/IRF/IRL530N.html
 

The schematic is correct but the MOSFET is the wrong kind of transistor and also massively over size for the job. You need a PNP bipolar transistor that can handle about 0.1A at 10V, not a MOSFET rated at 17A 100V!

The kind I am thinking of is like a 2N3906 or BC327 although almost any small PNP transistor will do, the task is not demanding at all.

Brian.
 

Ok, I'll shop better transistor tomorrow.

I have been trying to understand this schema, and now my head is spinning. If we give positive voltage through 33k resistor to base, isn't the transistor conducting from emitter to collector? And once the power source goes down, emitter - collector is not conducting anymore?
 

That would be the case if it was an NPN transistor and the emitter was grounded. If the values work and without knowing the exact voltage rise time or even if the switch is pulsed, the intention is the transisor base voltage is about the same as the emitter. In that condition the transistor will not conduct, the base has to be 0.6V or so more negative than the emitter to make it conduct. R3 will make the transistor conduct and hopefully, R4 will counteract it and stop it conducting. When the power source is turned off, there will be less current through R4 and hopefully the transistor will dump the charge on the capacitor.

Brian.
 

With that schema voltage at switch goes somehow up to 3,3 V. Should be 1,8 V.
 

I have assumed the switch is not in a matrix and the lower side is ground. If that is the case, the base voltage should be about 1.2V and the emitter (top of the capacitor) about 1.8V.

With the power turned off, can you check the resistance from each side of the switch to the negative side of the power supply please. It looks like either the switch IS in a matrix or it could be a high-side switch that pulls the lower voltage side high when closed rather than the high side low. Just measuring across the switch wouldn't reveal that.

Brian.
 

You are so helpful. Thank you for assisting me with this.

Power supply powered, phone off. From power supply negative to switch negative side = 0 ohms. From power supply negative to switch positive = no connection at all.

Note that I managed to turn phone on occasionally when measuring connection between power supply neg to switch positive side.
 

OK, that confirms it isn't in a matrix, if it was there would be signal on both sides of it. It also confirms it is a low side switch that pulls the 1.8V you measured to ground when the switch is closed. That leaves the problem of where the 3.3V comes from. Are you sure you connected the two resistors correctly with the 10K one on the ground (negative) side?

Brian.
 

Status
Not open for further replies.

Similar threads

Part and Inventory Search

Welcome to EDABoard.com

Sponsor

Back
Top