Vermes
Advanced Member level 4

- Joined
- Aug 2, 2011
- Messages
- 1,163
- Helped
- 0
- Reputation
- 0
- Reaction score
- 0
- Trophy points
- 1,316
- Activity points
- 22,318
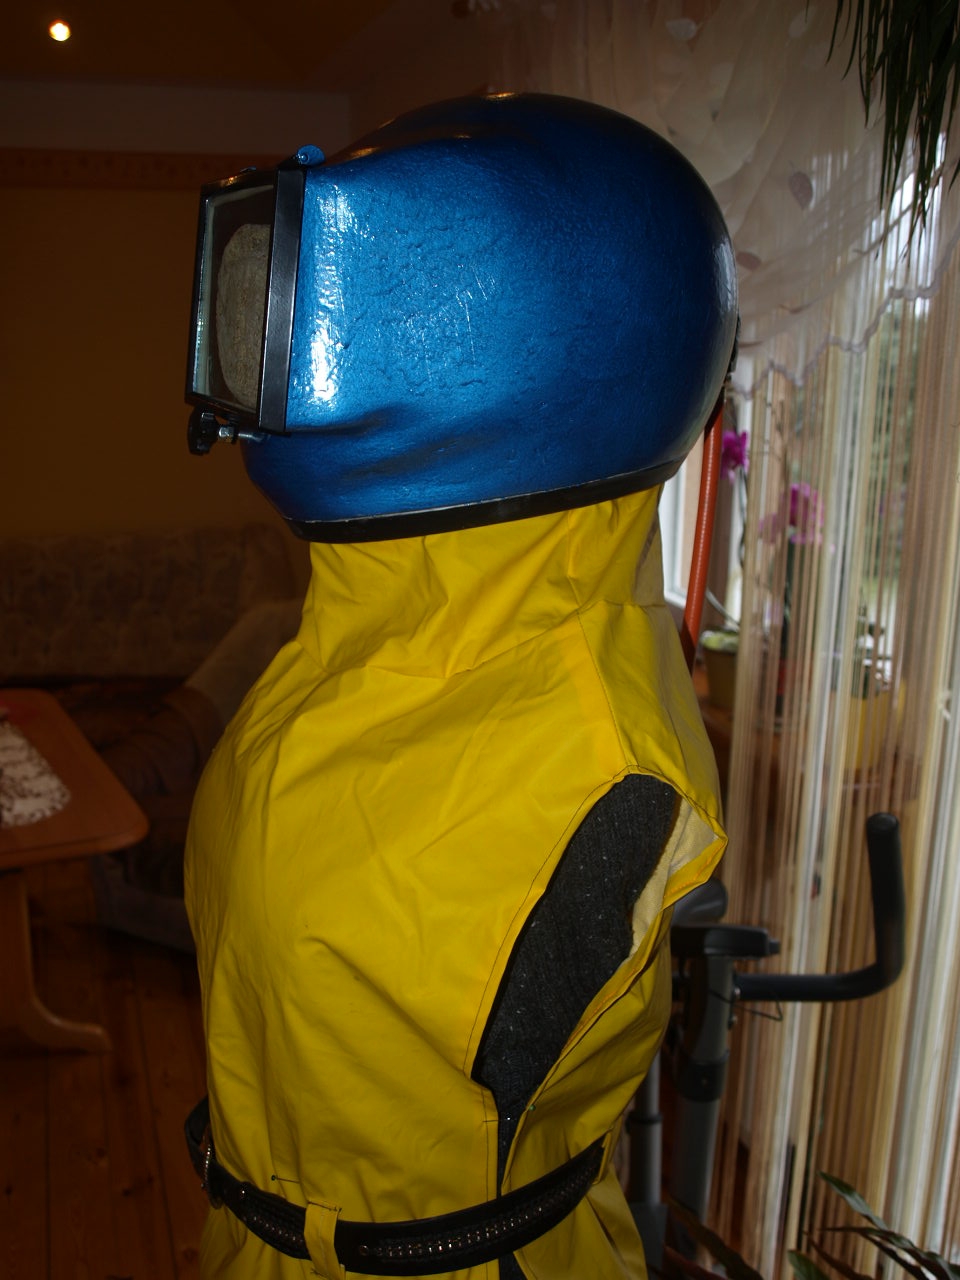
This is a very useful blasting helmet for everyone who want to protect health, especially eyes and lungs while working with sandblaster. When you do not want to buy an expensive factory equipment, try to do it yourself!
This helmet was made of motorcycle helmet. It uses halogen lamp 500W and a muff, plastic elbow, copper elbow and elements for the hose. You will also need epoxy resin and fiberglass, self-adhesive seal for windows, hose, self-adhesive strip with a bur, glue and paint.
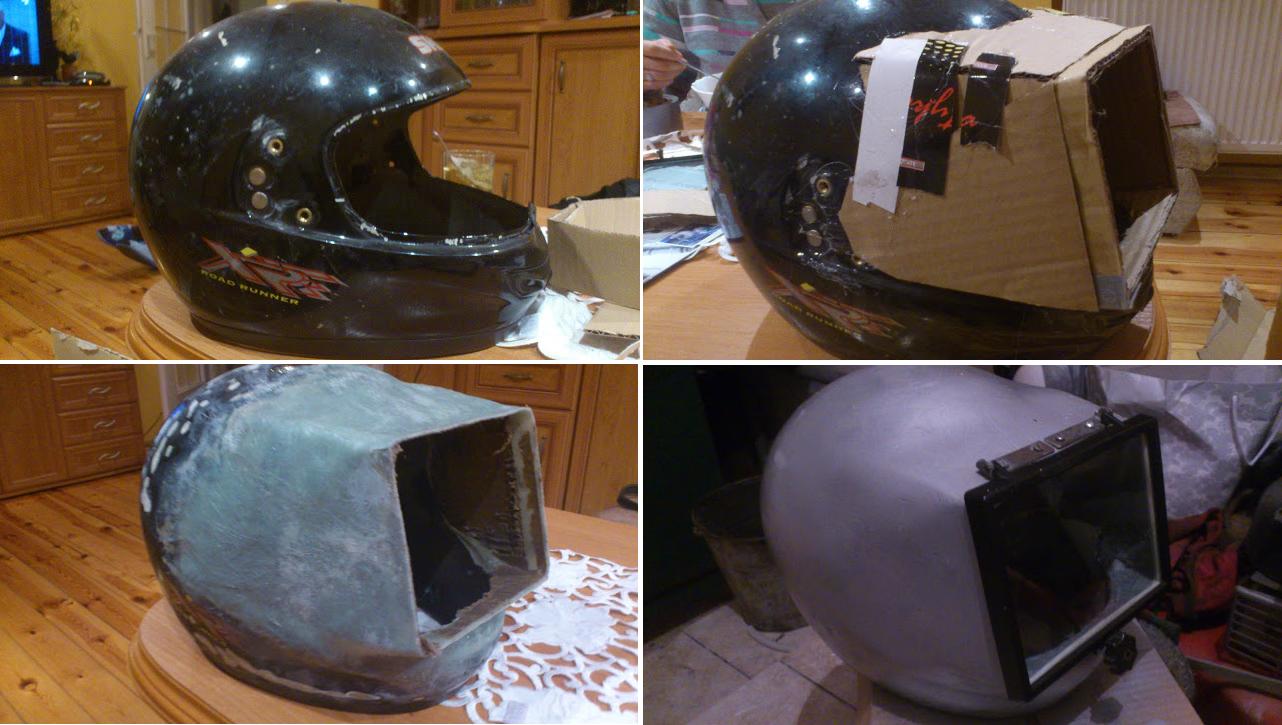
An old closed helmet made of epoxy resin (because plastic helmet will not be suitable for this application). Firstly, a viewfinder profile was built of a cardboard and fit the frame with glass from a halogen lamp. Then that profile was attached to the helmet using a hot silicone glue gun. Places where the resin was to be attached, were sanded and then it was time for the application of the resin and fibers.
When few layers of fiber are put and the resin dried, you can remove the cardboard profile by inserting it in water and then unnecessary elements were cut off from the inside of helmet using a angle grinder. That helped to widen the viewfinder hole.
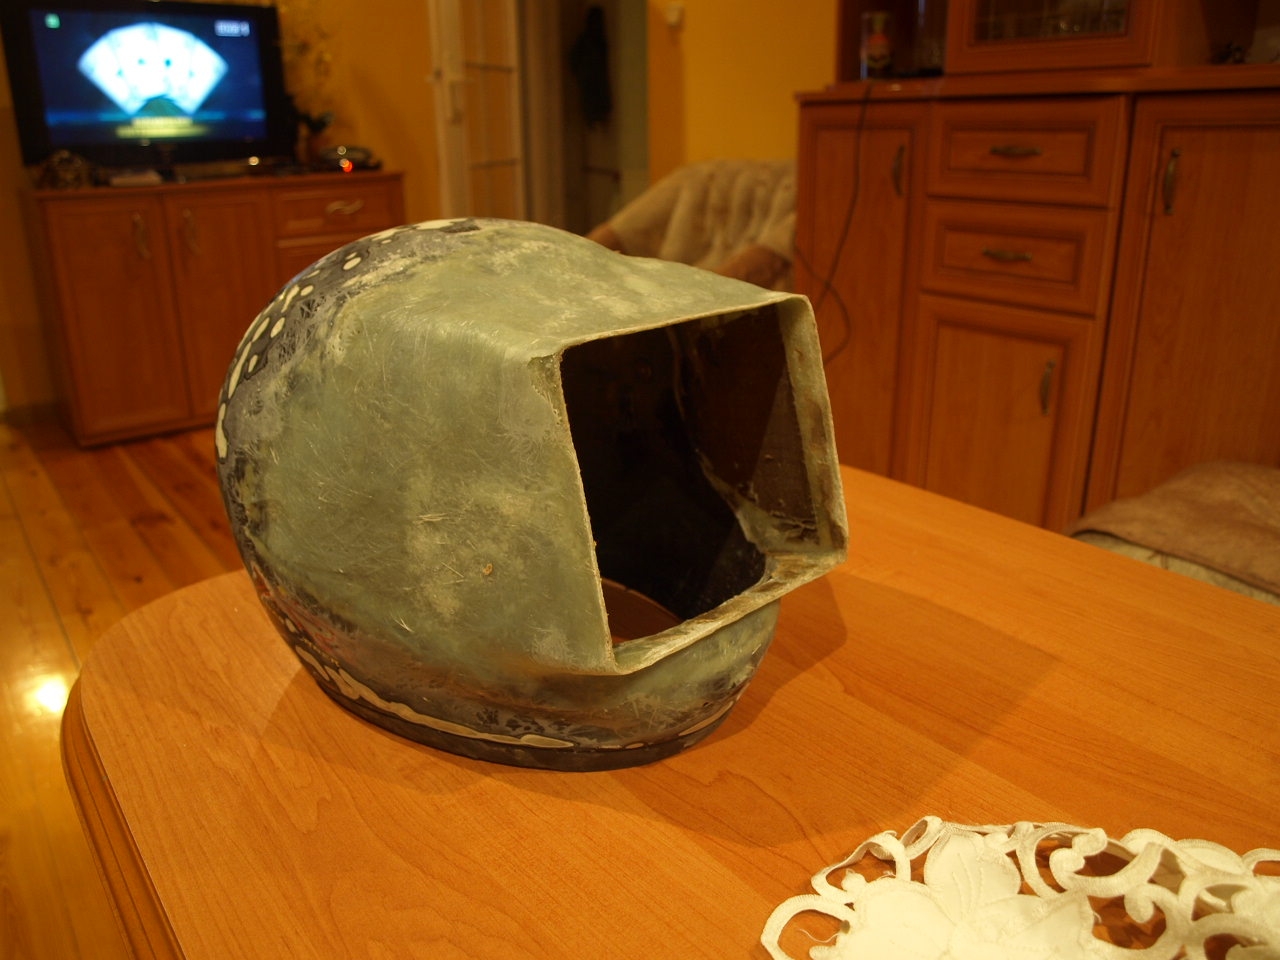

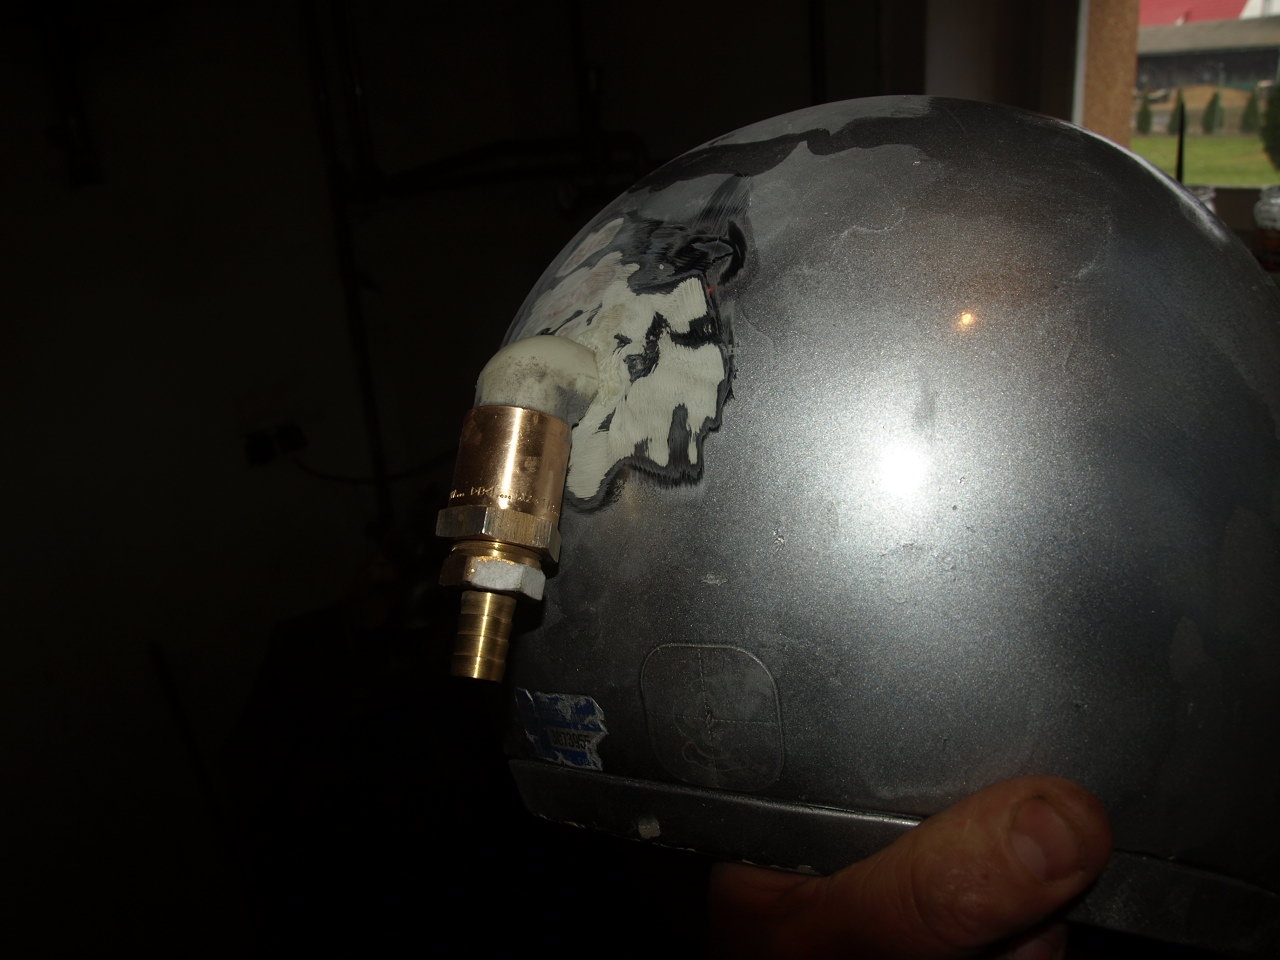
Then a hole was drilled on the back of helmet. It was prepared for putting the resin and elbows were mounted. Then all that was covered with resin and fiber (the hose visible in the picture was removed).


Inside the helmet there was Styrofoam which was cut to create the special channel for air and then it was glues with reinforcement self-adhesive tape.
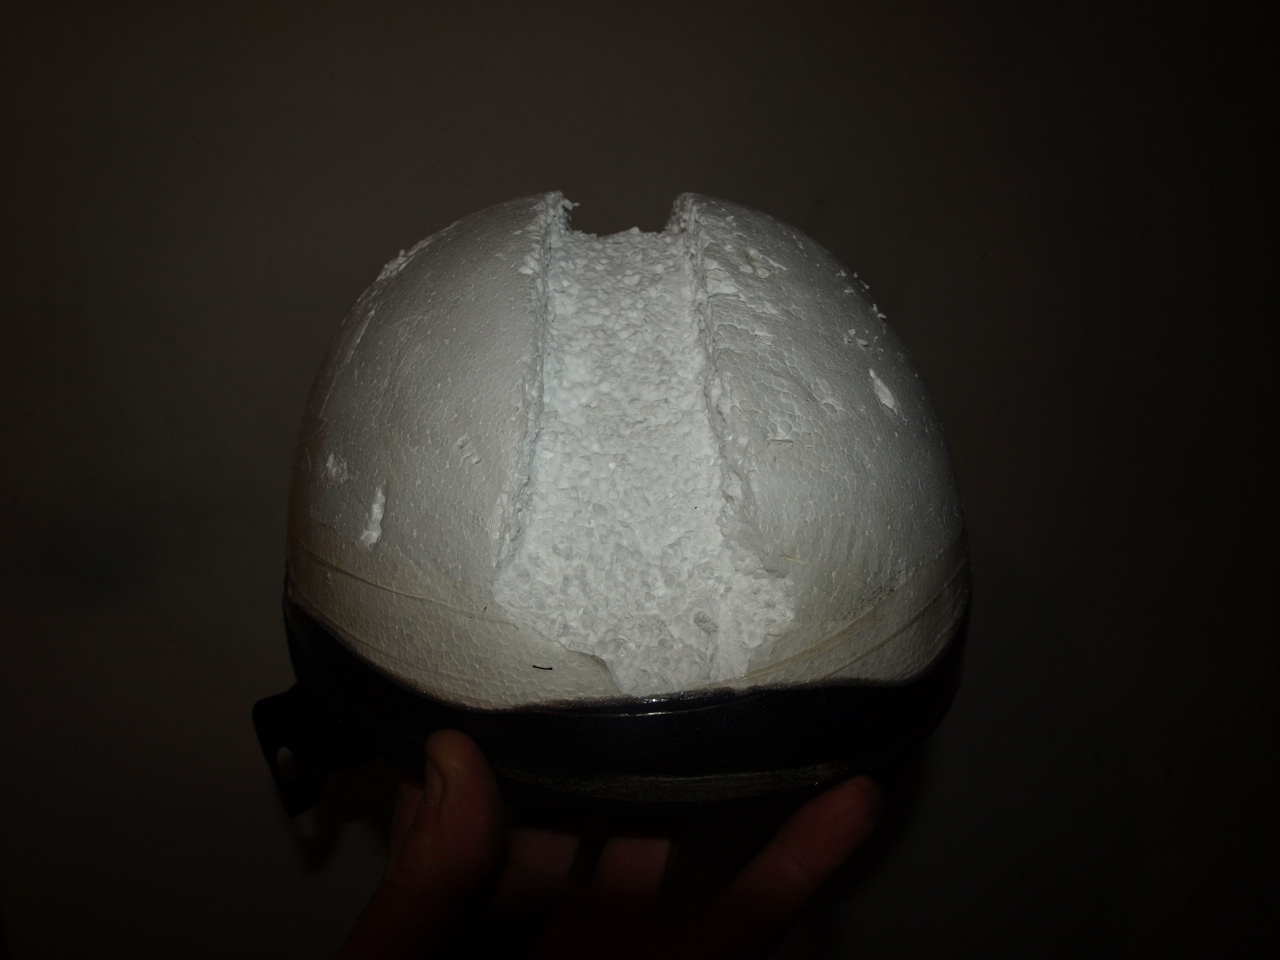
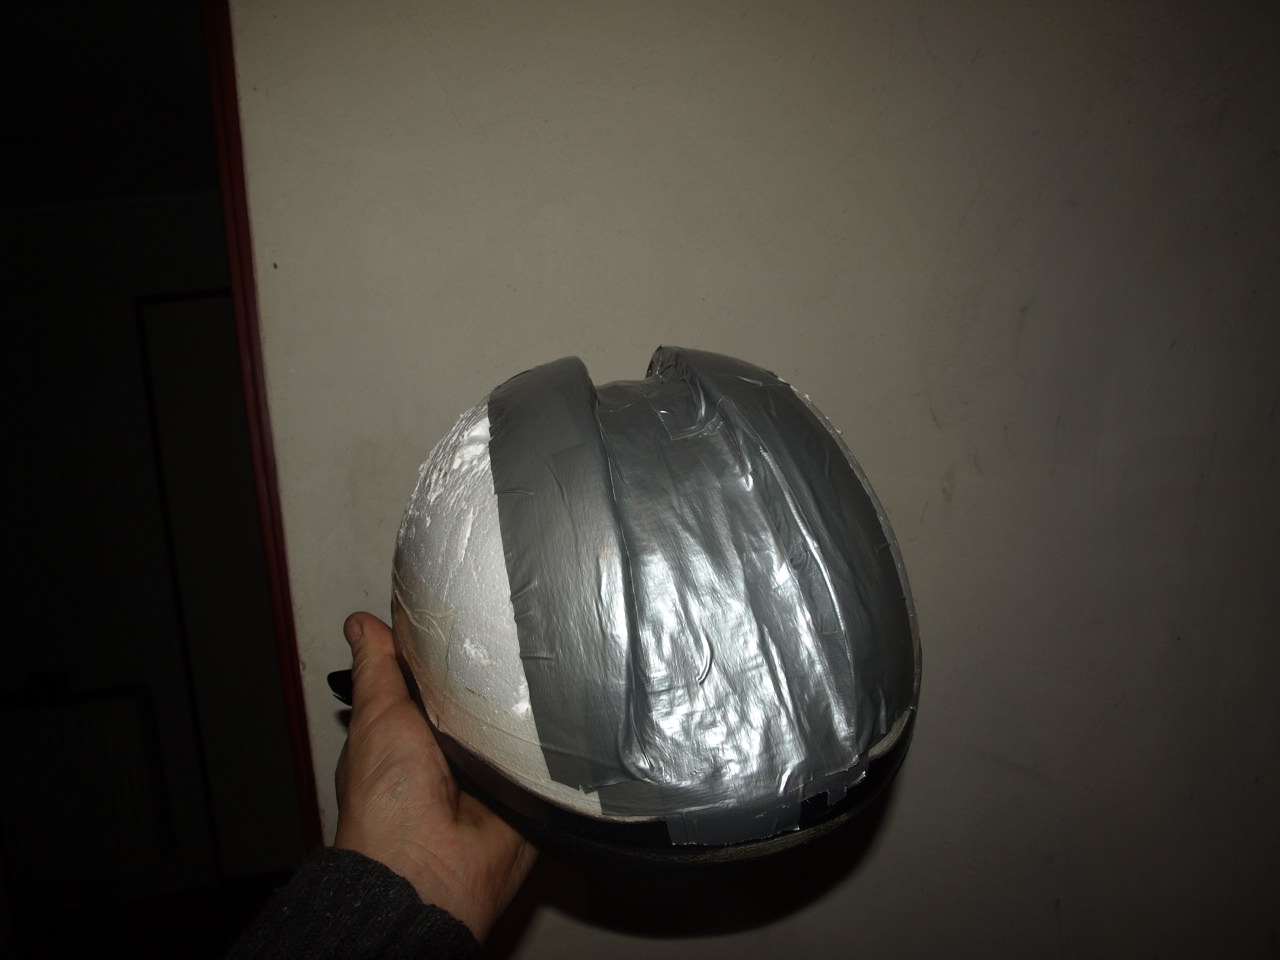

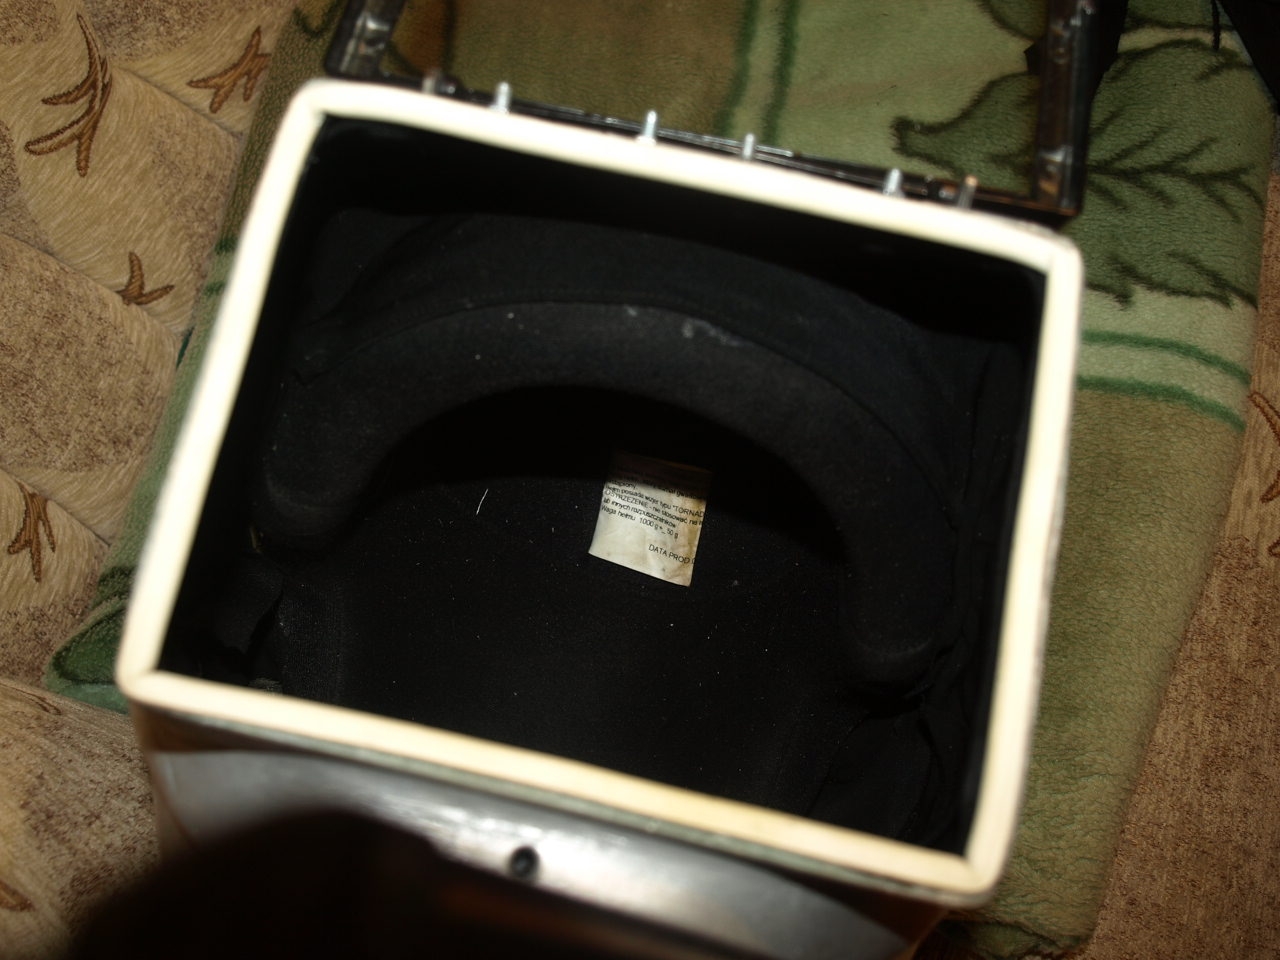
Then the insert was mounted. Under it there were put strips of 5mm thick Styrofoam so that air is dissipated between the shell and the insert throughout the helmet.
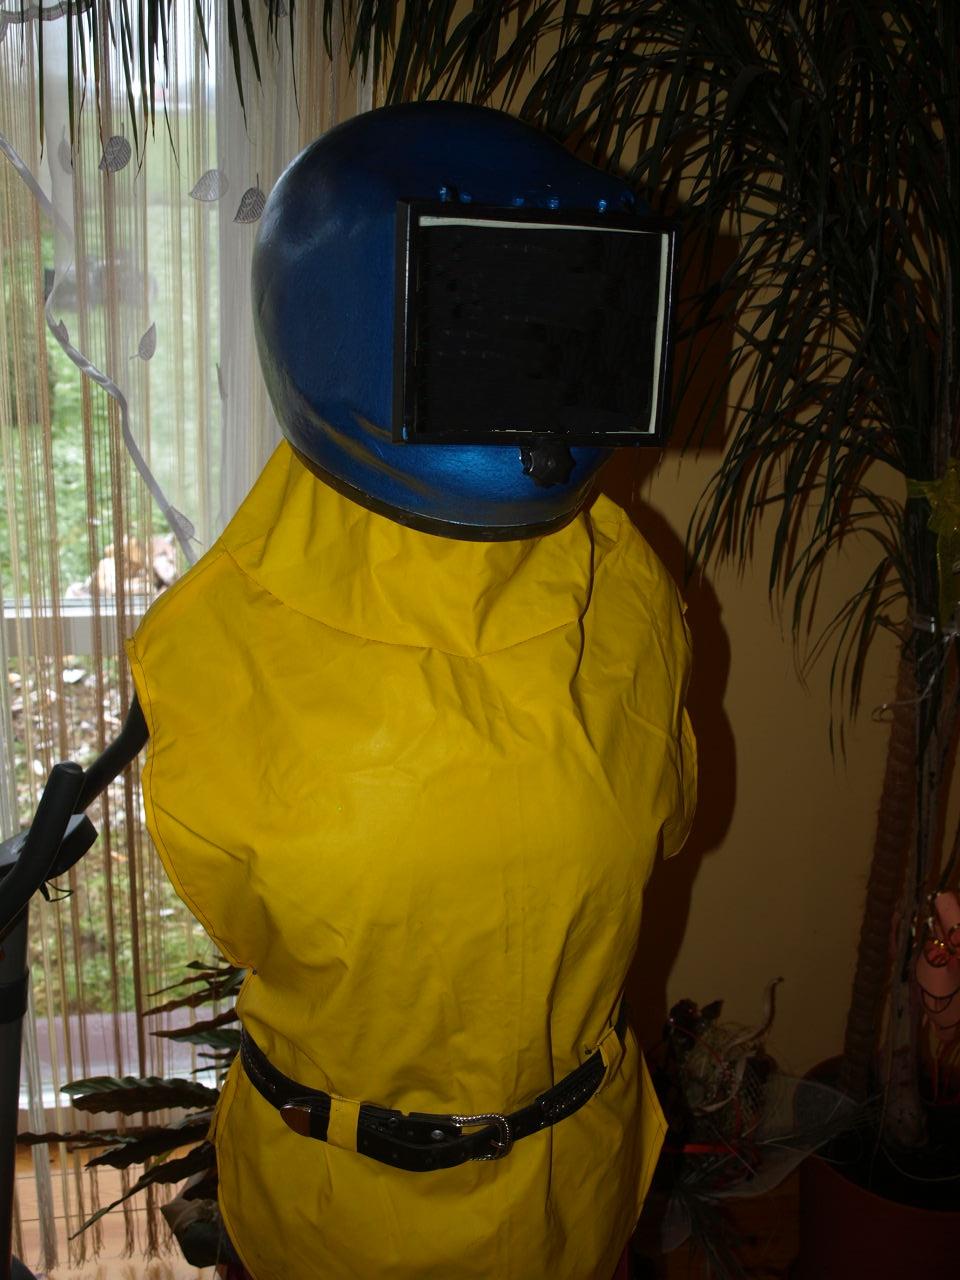
After sanding and painting, a frame with glass was mounted on hinges made of plate and self-adhesive seal was glued to the window.
Protective apron was made of old fishing trousers, attaching it to the helmet on self-adhesive bur.

And how it looks:


Link to original thread - Hełm do piaskowania domowej roboty za 100zł