Continue to Site

Welcome to EDAboard.com

Welcome to our site! EDAboard.com is an international Electronics Discussion Forum focused on EDA software, circuits, schematics, books, theory, papers, asic, pld, 8051, DSP, Network, RF, Analog Design, PCB, Service Manuals... and a whole lot more! To participate you need to register. Registration is free. Click here to register now.

[SOLVED] CSLA2DG Hall Current sensor with PIC16F676 problem!!

Status
Not open for further replies.

amjadali56

Full Member level 3
Joined
Sep 17, 2007
Messages
151
Helped
39
Reputation
78
Reaction score
36
Trophy points
1,328
Location
Earth
Activity points
2,042
Hi everyone! i am working with CSLA2DG Hall effect current sensor with PIC16F676 and 7 segment display as:
sensor supply volts are DC 8v
out put is DC 4.03 volts at 0 Amps and for every Ampere the voltage increment at 1 mv.

At PIC i used vADC * 500/1023 and (vADC / 10)% 10 is my first digit (I m trying to drop the 4v and want to plot the mv at 7 segment like 4.39V will be 39.0 Amps).

The problem is my reading is unreliable and jumpy :cry: so is there any other way I am sure my way is not good at all...... :???:

PHP:
//Sourced and refrenced by:  http://tahmidmc.blogspot.com/2014/06/simple-ac-voltmeter.html

#define SA RC4_bit  // 6
#define SB RC2_bit  // 8
#define SC RC1_bit  // 9
#define SD RC5_bit  // 5
#define SE RA4_bit  // 3
#define SF RC3_bit  // 7
#define SG RC0_bit  // 10
#define C1 RA5_bit  // 2
#define C2 RA2_bit  // 11
#define C3 RA1_bit  // 12

#define vinCh 0   // RA0

unsigned int voltage;

unsigned char SEGMENT;
const unsigned char COMMON_CATHODE = 1;
const unsigned char COMMON_ANODE = 0;
const unsigned char COMMON = COMMON_ANODE;
unsigned char DriveSegment[10];

const unsigned char AnodeDriveSegment[10] = {192, 249, 164, 176, 153, 146, 130, 248, 128, 144};

void initialize(void){
     unsigned char i;

     CMCON = 7;      
    TRISA = 1;       
     PORTA = 0;
     ANSEL = 1;
     ADC_Init();

     TRISC = 0;
     PORTC = 0;


          for (i = 0; i < 10; i++){
             DriveSegment[i] =  AnodeDriveSegment[i]; }


}

unsigned int getVoltage(void){
     unsigned int vADC;
     float realVolts;
     vADC = ADC_Get_Sample(vinCh);
     realVolts = (((float)vADC* 500)/1023);
     return (unsigned int) realVolts;
}

void displayVoltage(void){
     unsigned int SendVal;
     unsigned char Digit;
     unsigned char counter;

     for (counter = 0; counter < 3; counter++){ 
        SEGMENT++;
        if (SEGMENT > 3) SEGMENT = 1;

        C1 = 1; C2 = 1; C3 = 1;

        switch (SEGMENT){
               case 1:
                    Digit = (unsigned char) ((voltage / 10)% 10);
                    break;
               case 2:
                    Digit = (unsigned char) (voltage  % 10);
                    break;
               case 3:
                    Digit = (unsigned char) ((voltage / 10) % 10) ;
                    break;

        }

        SendVal = DriveSegment[Digit] & 0x7F; // Make bit 7 zero

        SA = SendVal & 1;             // bit 0
        SB = (SendVal & 2) >> 1;      // bit 1
        SC = (SendVal & 4) >> 2;      // bit 2
        SD = (SendVal & 8) >> 3;      // bit 3
        SE = (SendVal & 16) >> 4;     // bit 4
        SF = (SendVal & 32) >> 5;     // bit 5
        SG = (SendVal & 64) >> 6;     // bit 6


        switch (SEGMENT){
               case 1:
                    C1 = 0;
                    break;
               case 2:
                    C2 = 0;
                    break;
               case 3:
                    C3 = 0;
                    break;
        }

        delay_ms(5);
     }
}

 void main()
  {
     char samplecounter;

     initialize();
     while (1){
           voltage = getVoltage();
           for (samplecounter = 0; samplecounter < 80; samplecounter++){
               displayVoltage();
           }
     }
}
 

I am seeing the sensitivity of this sensor as 16.2mV @ 8V supply. How come you are using 1mV change as an Ampere change? If the input current is AC, it is obvious that the ADC readings you are getting are varying. You may have to use an algorithm to convert this to RMS reading if the input current is AC. These are the two things you may have to look into first.
 

I am seeing the sensitivity of this sensor as 16.2mV @ 8V supply. How come you are using 1mV change as an Ampere change? If the input current is AC, it is obvious that the ADC readings you are getting are varying. You may have to use an algorithm to convert this to RMS reading if the input current is AC. These are the two things you may have to look into first.

Thanks for your replay ravindragudi.
First of all i am measuring DC current so this side is smooth. The problem is data read i think. when my DVM shows 4.38v for example the 7 segment shows 00.1 then 23.3 then 99.9 and so on. i thin my approach for the hall sensor is not prompt.
Unfortunately i did not find any application Note on CSLA2DG. it will be great help if pointed with any reference or application note regarding CSLA2DG. other wise some one kindly hit me with any other alternative such as CT or shunt type ammeter for 30 Amps DC.
 

There is a way to figure out if the sensor is functioning properly and also to check if your code is working fine -
Assuming that you are having only a single turn of wire through the sensor, a change of 1 Amps in this should change the output voltage by 16.2mV. If you are using N turns through the sensor, then the output voltage should change by N X 16.2 mV. This you can verify using DMM and also by another small piece of code to output the ADC value.
I am attaching a document related to this sensor where the sensor terminologies are explained and some more details are there. Refer to page # 55.

- - - Updated - - -

There is a way to figure out if the sensor is functioning properly and also to check if your code is working fine -
Assuming that you are having only a single turn of wire through the sensor, a change of 1 Amps in this should change the output voltage by 16.2mV. If you are using N turns through the sensor, then the output voltage should change by N X 16.2 mV. This you can verify using DMM and also by another small piece of code to output the ADC value.
I am attaching a document related to this sensor where the sensor terminologies are explained and some more details are there. Refer to page # 55.
 

Attachments

  • Honeywell_Current_Sensor_Hall_Doc.pdf
    355.6 KB · Views: 127
now we are getting some way.
Measured Current = (Vsensor - 4.0) / 0.033
so 5v on DVM will be:
(5V - 4V)/ 0.033 = 30 Amps (checked with DTM21 DVM and Ammeter):thumbsup:

should i use boost circuit to get a round figure data for ADC or do it through programming (which is not my good side) ????
how should i subtract this constant 4v . through hardware or software? (e.g Using 4V zener in series with resistor to ground).
 
Last edited:

hello,


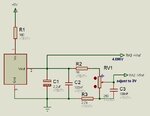
if you power up your sensor with 6V (minima)
and use 3 turns of wire in the tore
you will get about 30mv up to 45mV per Amps voltage change
and offset of Vcc/2 = 6/2=3V

so you can use external references for the PIC
+Vref at 4.096V
-Vref at 3V
it's gives a scaling of 1023 pts for 1096mV
and for 30amps => input ADC= 3V + 30x0.033 ~3.99V
3,990V - (-VREF)= 990 mV

990*1024/1096= 924 pts for 30 Amps


a better resolution !
~30 points / Amps
0.033 Amps/pt

Ref_Pic.JPG
 
hello,


if you power up your sensor with 6V (minima)
and use 3 turns of wire in the tore
you will get about 30mv up to 45mV per Amps voltage change
and offset of Vcc/2 = 6/2=3V

so you can use external references for the PIC
+Vref at 4.096V
-Vref at 3V
it's gives a scaling of 1023 pts for 1096mV
and for 30amps => input ADC= 3V + 30x0.033 ~3.99V
3,990V - (-VREF)= 990 mV

990*1024/1096= 924 pts for 30 Amps


a better resolution !
~30 points / Amps
0.033 Amps/pt

View attachment 114416

I guess some correction required in the calculations ... if using 3 turns of wire and 30A current is flowing through it, the current in calculation shall be 90A instead of 30A. And also the sensitivity of the sensor need to be checked for with constant current and the sensor can be calibrated to get accurate results.
 
I guess some correction required in the calculations ... if using 3 turns of wire and 30A current is flowing through it, the current in calculation shall be 90A instead of 30A. And also the sensitivity of the sensor need to be checked for with constant current and the sensor can be calibrated to get accurate results.

yes the current calc will be for 90A ..... i think the turn ratio doesn't matter in my case.
i m using 8v and offset= 4V and per Amps resolution is 0.033V . my main problem is programming.. ( defiantly this can achieve by code)
Paul you hit the nail but the problem is only 1 RA3 is spear and all other pins are already in use.(its PIC16F676 and 3 digits display)
thanks buddies for your keen interest in my problem:p
 

hello,


if you power up your sensor with 6V (minima)
and use 3 turns of wire in the tore
you will get about 30mv up to 45mV per Amps voltage change
and offset of Vcc/2 = 6/2=3V

so you can use external references for the PIC
+Vref at 4.096V
-Vref at 3V
it's gives a scaling of 1023 pts for 1096mV
and for 30amps => input ADC= 3V + 30x0.033 ~3.99V
3,990V - (-VREF)= 990 mV

990*1024/1096= 924 pts for 30 Amps


a better resolution !
~30 points / Amps
0.033 Amps/pt

View attachment 114416

Thank you very much...........:thumbsup::thumbsup::thumbsup:
 

Status
Not open for further replies.

Part and Inventory Search

Welcome to EDABoard.com

Sponsor

Back
Top