[Debug][Keil][STM32CubeIDE] How to debug Keil's STM32 project in STM32CubeIDE? (Part 1)
The background:
I have found a way to debug a Keil's project using OpenOCD inside STM32CubeIDE.
This approach assumes that the Keil built the project to the .elf file using fromelf.exe tool.
The same method can be successfully used for debugging in any other capable environment, e.g. VSCode.
The solution:
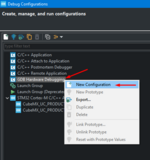
Let's start with creating debug config file in STM32CubeIDE for the same MCU like in Keil's project. It will be used to debug a target Keil's project.
As an example STM32L041G6Ux will be used:


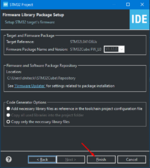
STM32 project location can be wherever you like. It is only important to have "Executable" and "STM32Cube" checked.


The result of creating a dummy STM32CubeIDE's project for the same MCU is presented below:

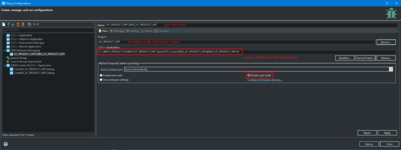
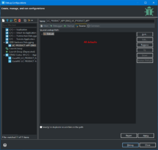
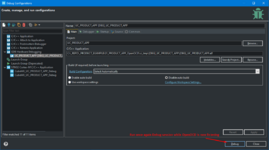
Now create debug configuration file by selecting all settings as follows:


At this point using STLINK, you should start debugging just created dummy STM32CubeIDE's project:

NOTE: This newly generated Debug Configuration File "..._Debug.cfg" can be used to debug Keil's project in both: STM32CubeIDE and/or VSCode.
From this point you can proceed to:
[Debug][Keil][STM32CubeIDE] How to debug Keil's STM32 project in STM32CubeIDE? (Part 2)
or
[Debug][Keil][VSCode] How to debug Keil's STM32 project in VSCode?
Hope it was helpful for someone there.
------------------------------------------------------
Is this blog entry helpful or does it need an improvement?
Please leave the comment below.
I have found a way to debug a Keil's project using OpenOCD inside STM32CubeIDE.
This approach assumes that the Keil built the project to the .elf file using fromelf.exe tool.
The same method can be successfully used for debugging in any other capable environment, e.g. VSCode.
The solution:
Let's start with creating debug config file in STM32CubeIDE for the same MCU like in Keil's project. It will be used to debug a target Keil's project.
As an example STM32L041G6Ux will be used:
STM32 project location can be wherever you like. It is only important to have "Executable" and "STM32Cube" checked.
The result of creating a dummy STM32CubeIDE's project for the same MCU is presented below:
Now create debug configuration file by selecting all settings as follows:
At this point using STLINK, you should start debugging just created dummy STM32CubeIDE's project:
NOTE: This newly generated Debug Configuration File "..._Debug.cfg" can be used to debug Keil's project in both: STM32CubeIDE and/or VSCode.
From this point you can proceed to:
[Debug][Keil][STM32CubeIDE] How to debug Keil's STM32 project in STM32CubeIDE? (Part 2)
or
[Debug][Keil][VSCode] How to debug Keil's STM32 project in VSCode?
Hope it was helpful for someone there.
------------------------------------------------------
Is this blog entry helpful or does it need an improvement?
Please leave the comment below.
[Debug][Keil][STM32CubeIDE] How to debug Keil's STM32 project in STM32CubeIDE? (Part 2)
Continuation from [Debug][Keil][STM32CubeIDE] How to debug Keil's STM32 project in STM32CubeIDE? (Part 1)
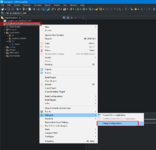
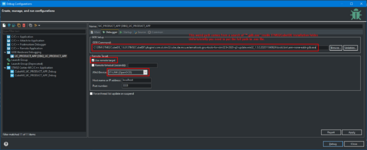
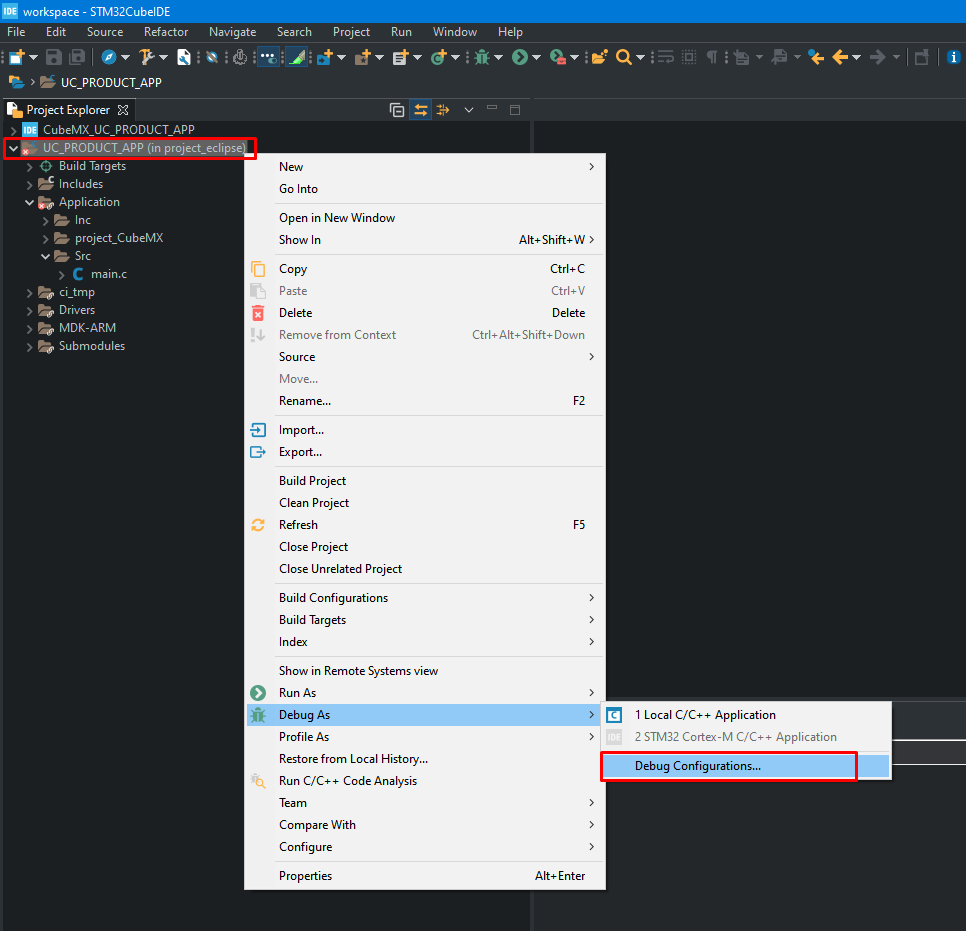
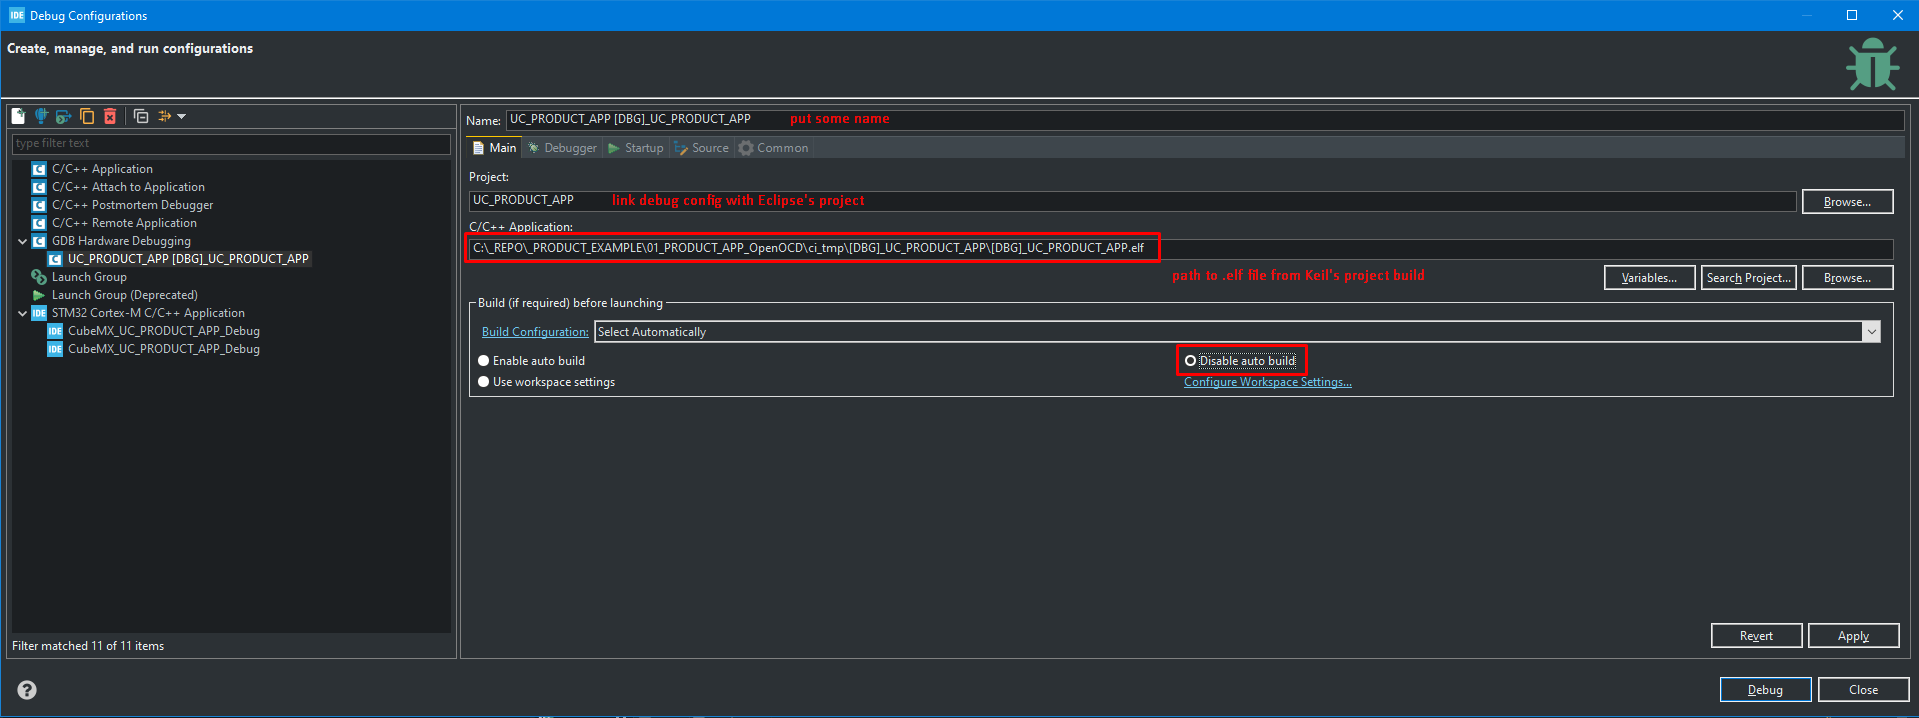
Now get back to the target Keil's project and select all following settings.
If you haven't created STM32CubeIDE's project from your Keil's project yet, then follow these two blog entries:
[Keil][STM32CubeIDE] How to create STM32CubeIDE project from Keil's project source files?
[Keil][STM32CubeIDE] Keil integration into STM32CubeIDE

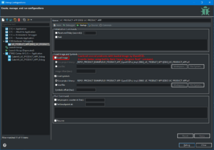
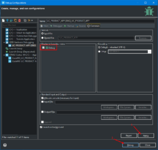
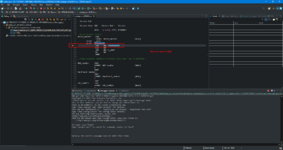
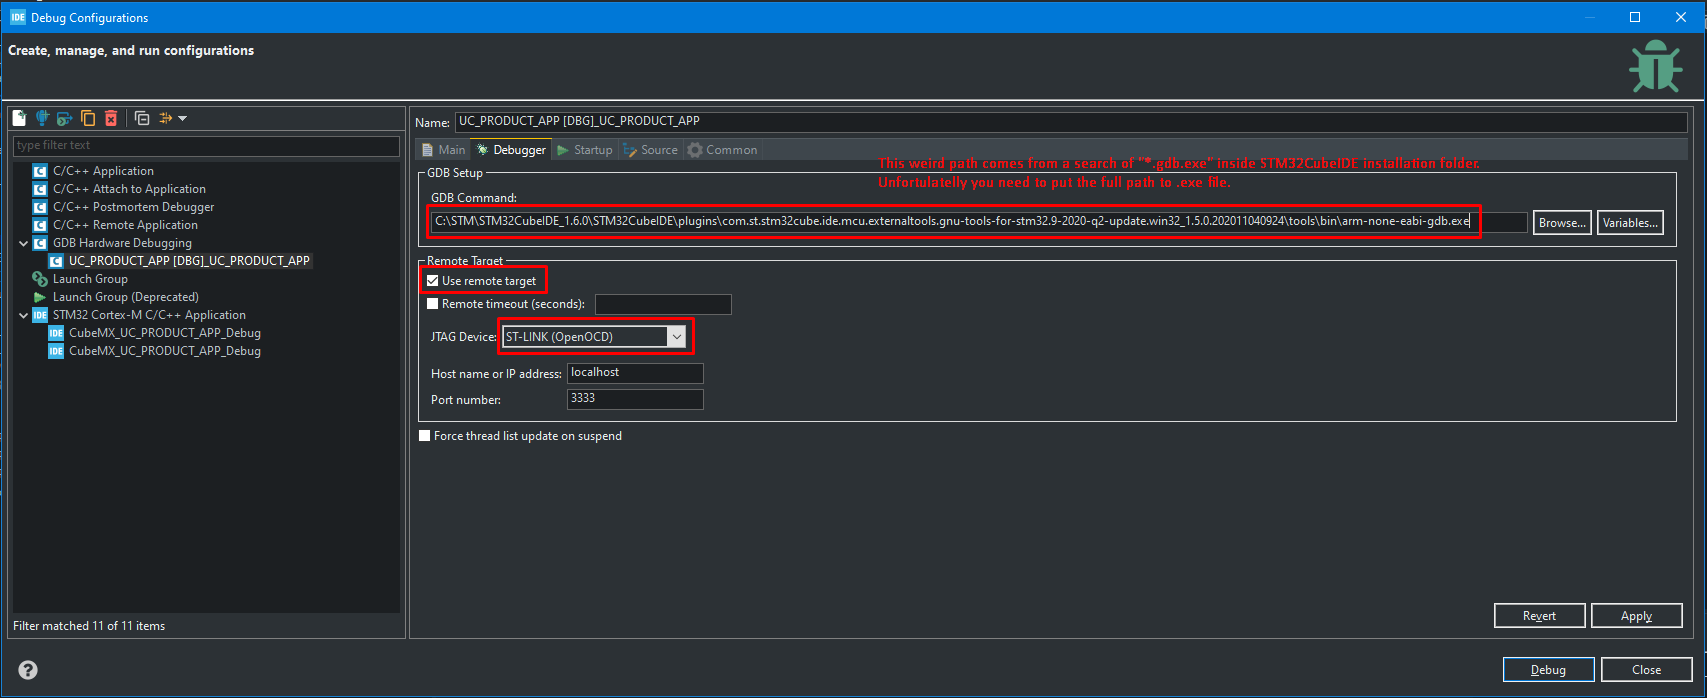
Now is the hardest step. You need to search for "arm-none-eabi-gdb.exe" file in your version of STM32CubeIDE - unfortunately the full path is needed.
Mine was as presented in the picture below:
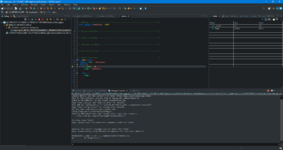
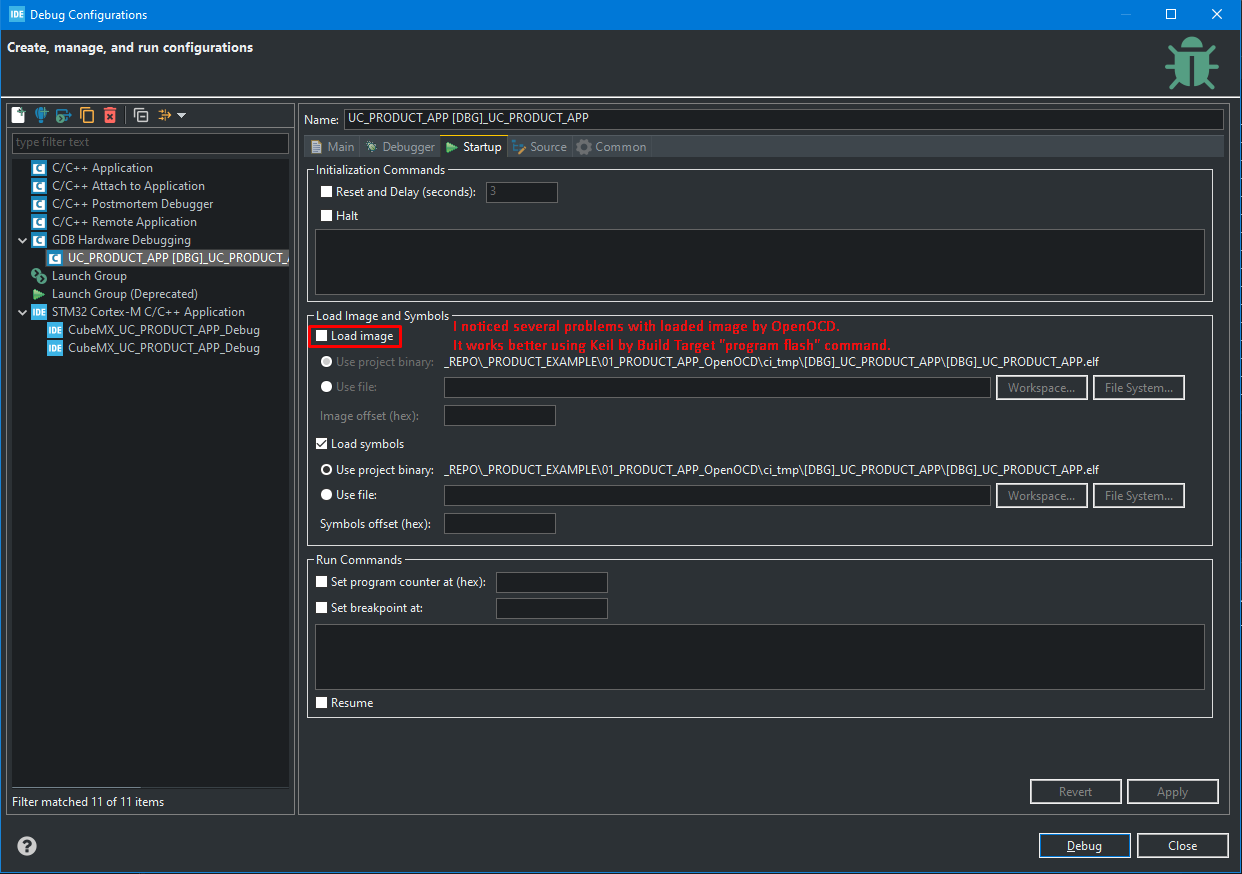
I noticed several problems with loaded image by OpenOCD. I suggest not to check "Load image" option.
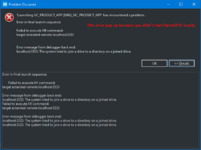
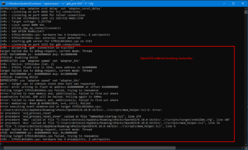
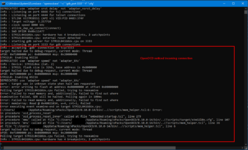
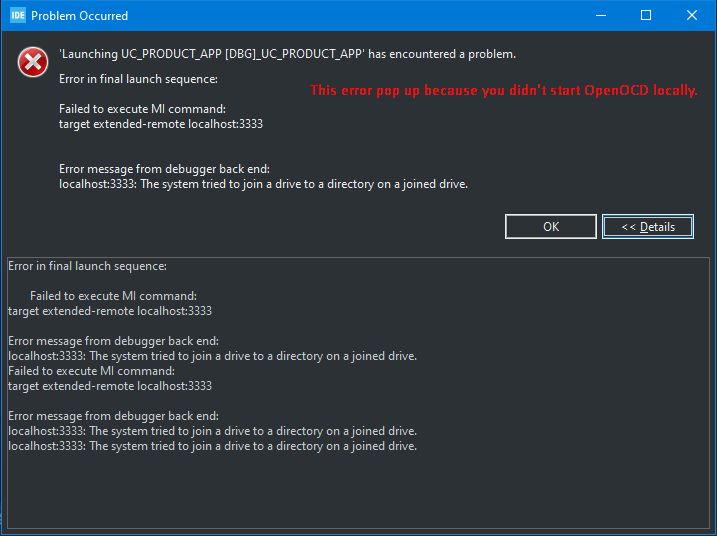
At this point perhaps OpenOCD is not working locally at your PC. The following error can appear then.
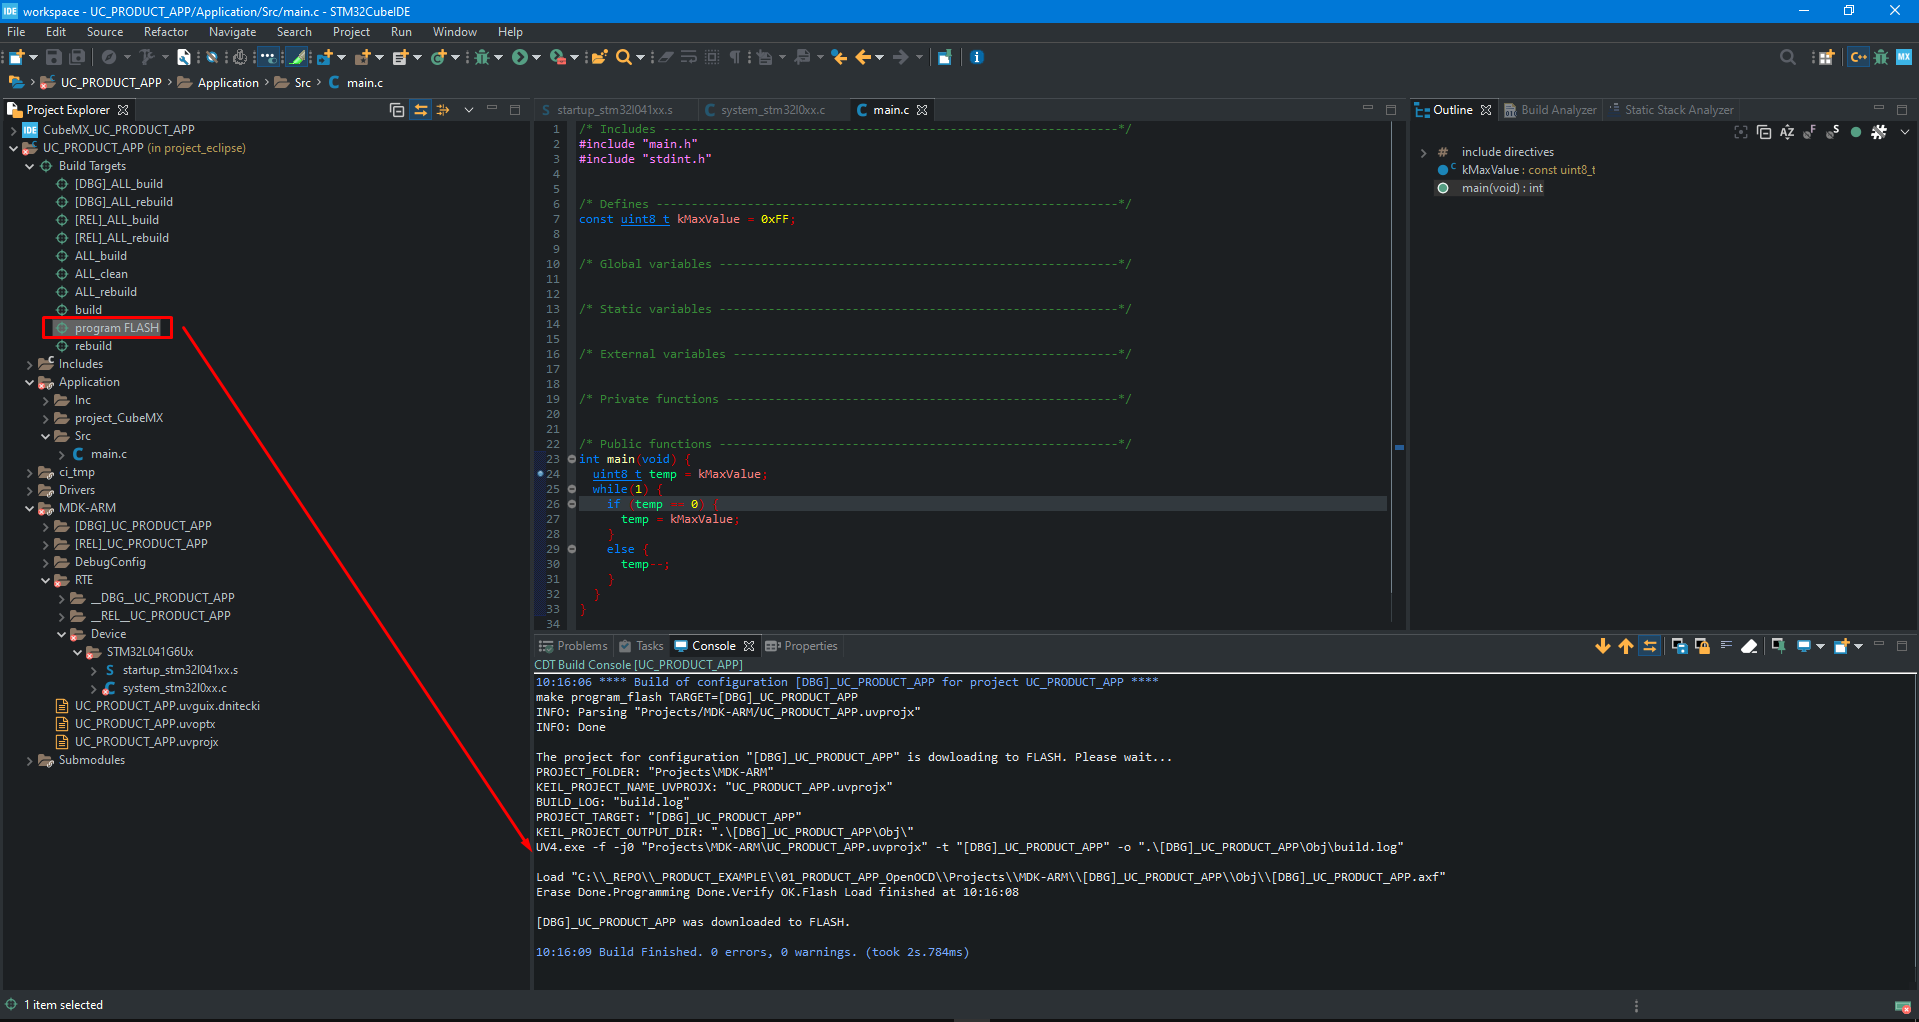
I suggest to use Keil to program FLASH. You can do so from STM32CubeIDE - use Build Target approach and "program_flash" command.
The picture below presents effect of FLASH programming command. It uses Keil's project settings. Of course your board needs to be powered on and connected through a debugger/programmer.
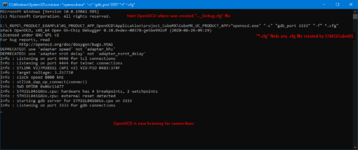
Now start OpenOCD in separate CMD window in a place where you created debug config file for a dummy STM32CubeIDE's project for the same MCU, as an example below:
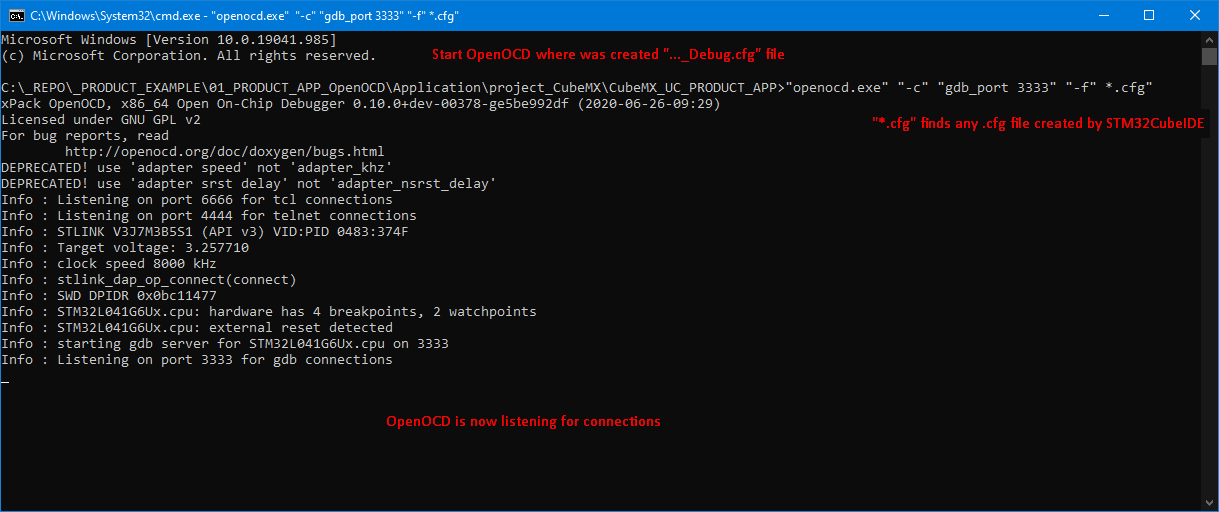
Copy/paste content:
Run debug once again:

OpenOCD should detect incoming connection now:

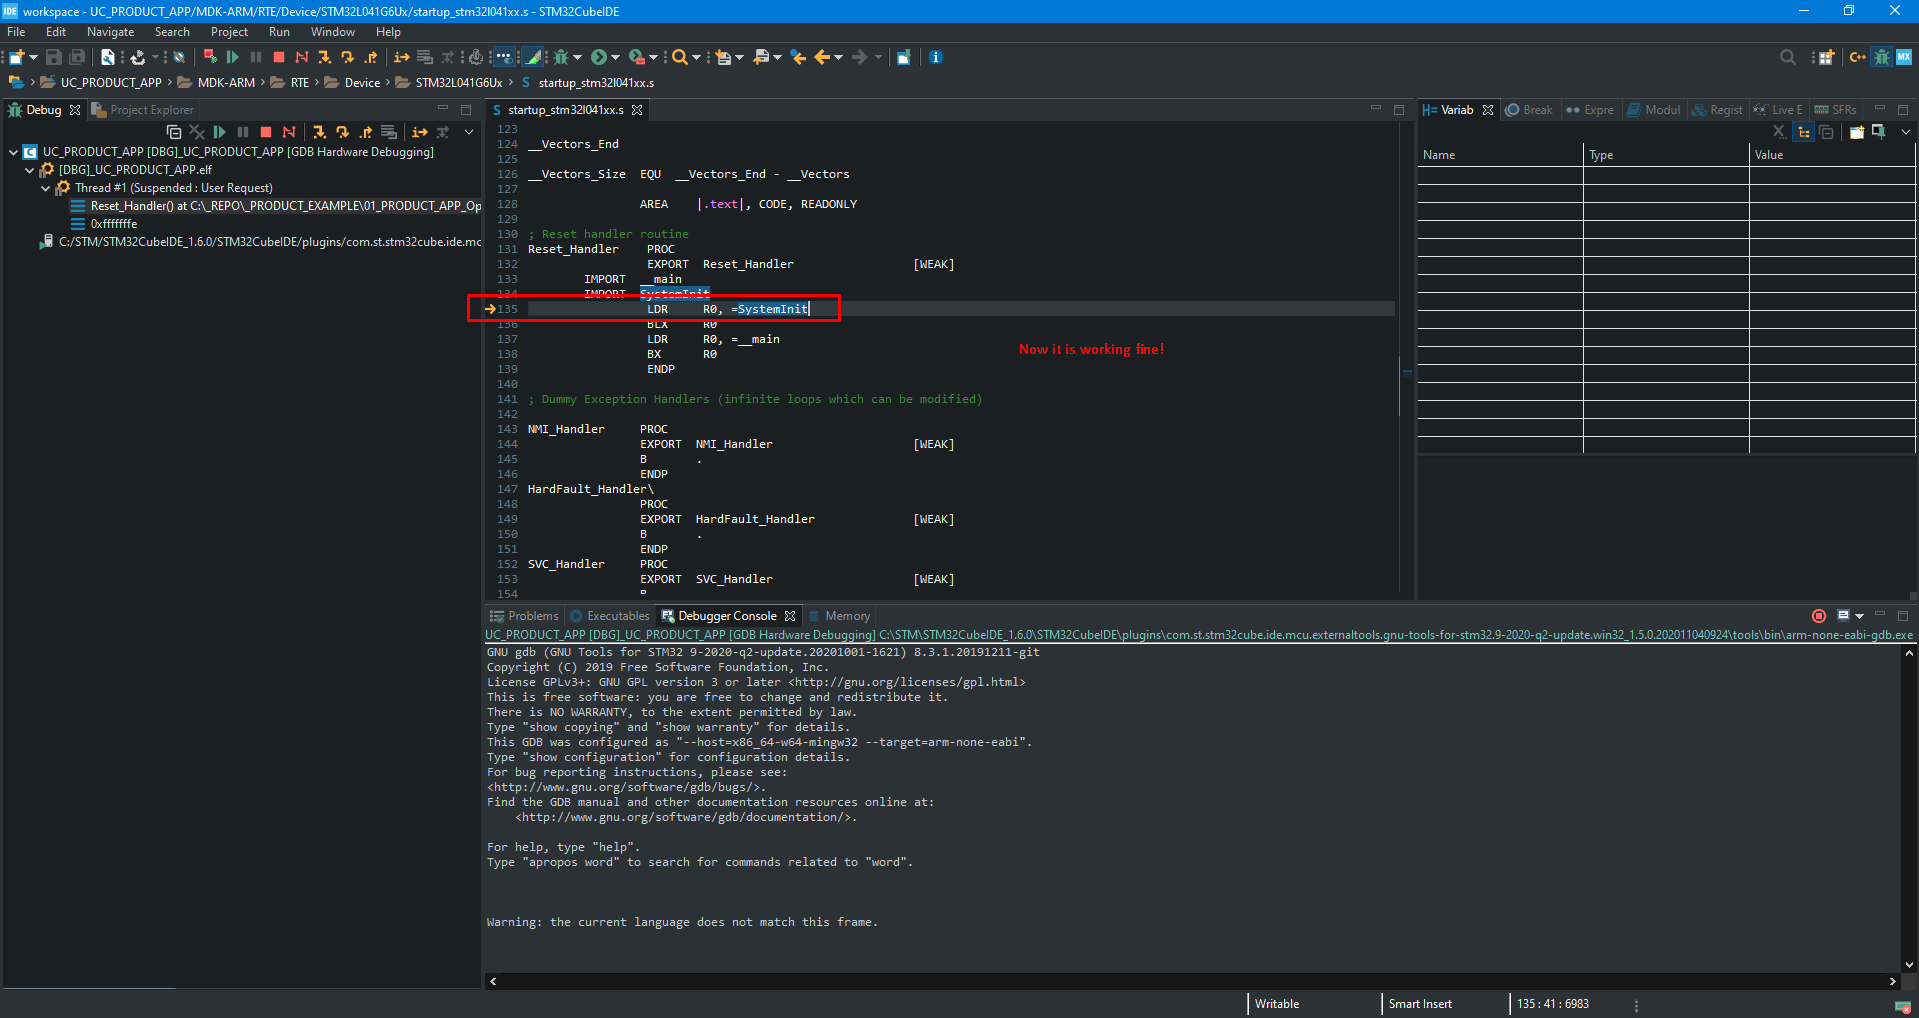
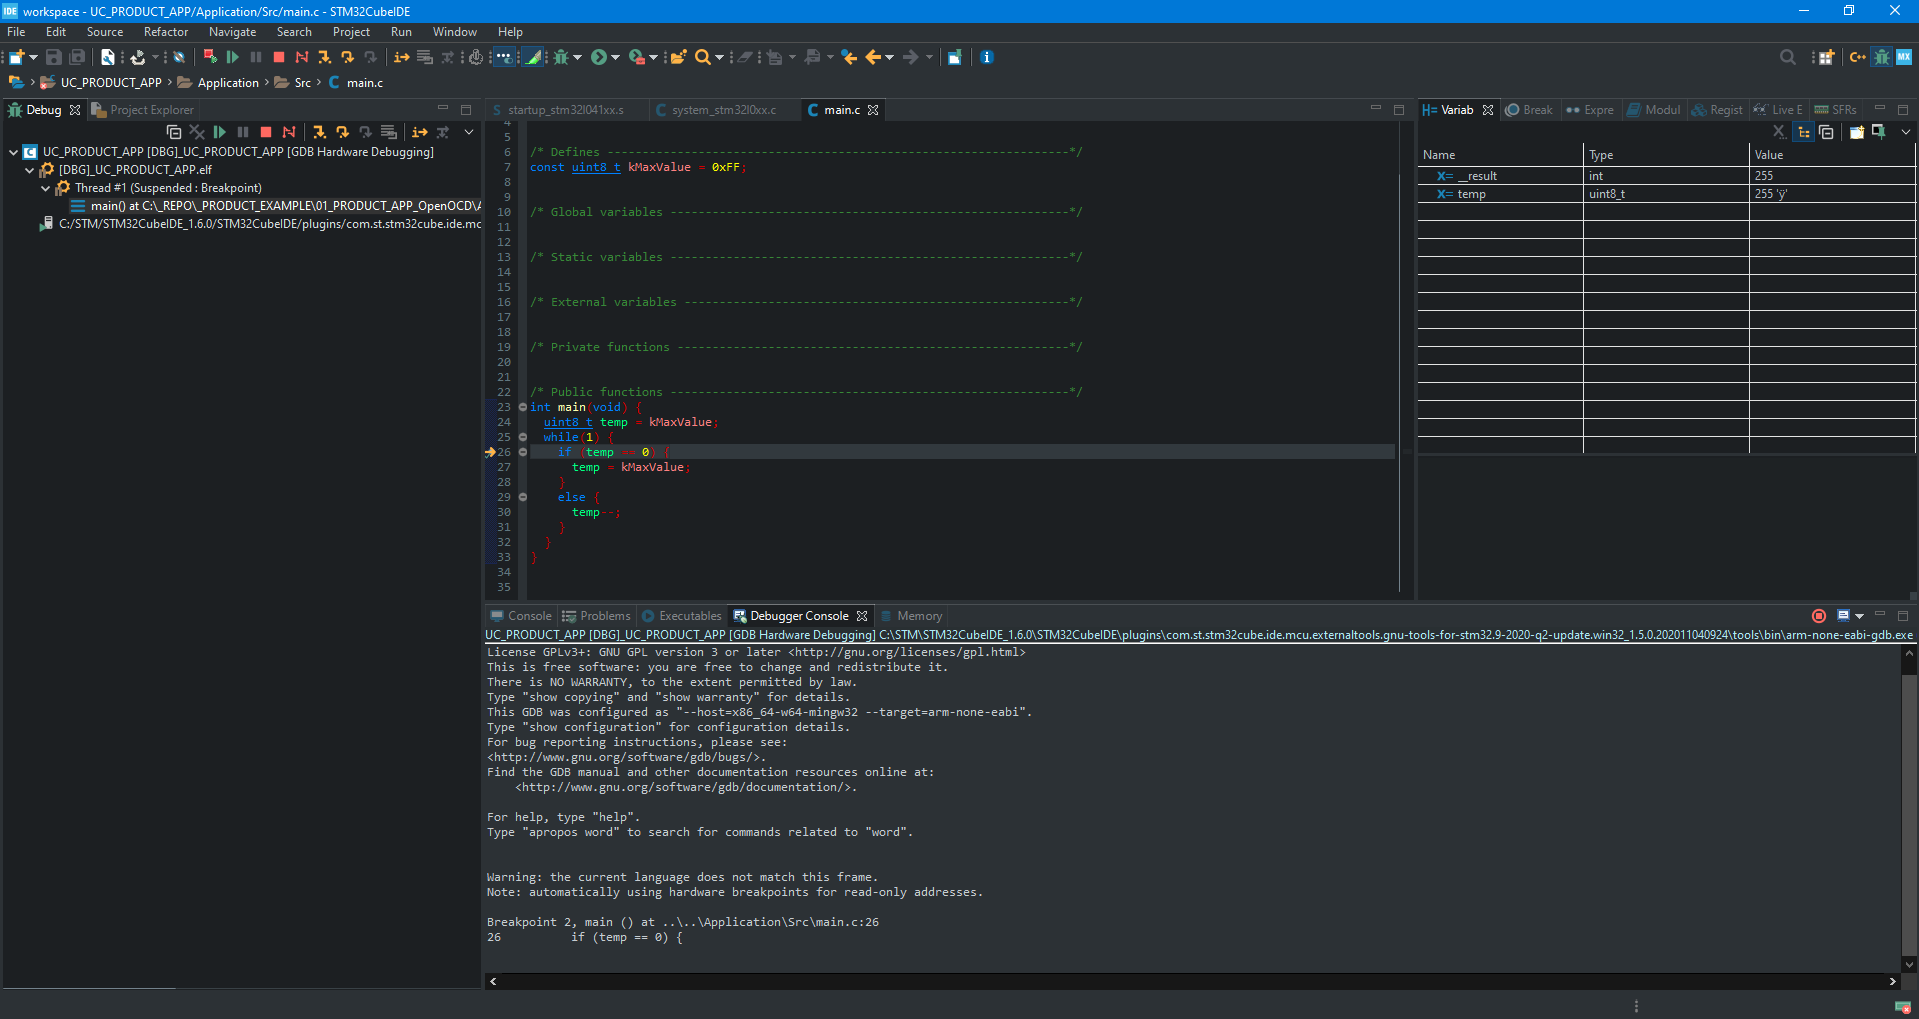
The final effect of debugging Keil's project inside STM32CubeIDE is presented on following pictures:
Hope it was helpful for someone there.
------------------------------------------------------
Is this blog entry helpful or does it need an improvement?
Please leave the comment below.
Now get back to the target Keil's project and select all following settings.
If you haven't created STM32CubeIDE's project from your Keil's project yet, then follow these two blog entries:
[Keil][STM32CubeIDE] How to create STM32CubeIDE project from Keil's project source files?
[Keil][STM32CubeIDE] Keil integration into STM32CubeIDE
Now is the hardest step. You need to search for "arm-none-eabi-gdb.exe" file in your version of STM32CubeIDE - unfortunately the full path is needed.
Mine was as presented in the picture below:
I noticed several problems with loaded image by OpenOCD. I suggest not to check "Load image" option.
At this point perhaps OpenOCD is not working locally at your PC. The following error can appear then.
I suggest to use Keil to program FLASH. You can do so from STM32CubeIDE - use Build Target approach and "program_flash" command.
The picture below presents effect of FLASH programming command. It uses Keil's project settings. Of course your board needs to be powered on and connected through a debugger/programmer.
Now start OpenOCD in separate CMD window in a place where you created debug config file for a dummy STM32CubeIDE's project for the same MCU, as an example below:
Copy/paste content:
Run debug once again:
OpenOCD should detect incoming connection now:
The final effect of debugging Keil's project inside STM32CubeIDE is presented on following pictures:
Hope it was helpful for someone there.
------------------------------------------------------
Is this blog entry helpful or does it need an improvement?
Please leave the comment below.