Vermes
Advanced Member level 4

- Joined
- Aug 2, 2011
- Messages
- 1,163
- Helped
- 0
- Reputation
- 0
- Reaction score
- 0
- Trophy points
- 1,316
- Activity points
- 22,318

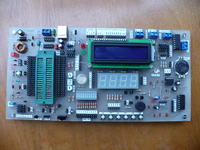
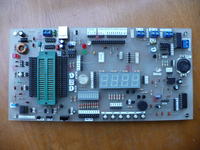
Described here construction of a universal development kit can be a great alternative for expensive factory development kits which often offer small number of functions or lack basic peripherals.
The most important advantages of the PCB are:
- the possibility to connect any microcontroller in DIP housing to 40 pin or connect it to the board by means of cables of another system, such as ST Discovery with AVR etc
- the possibility to power the PCB using one of five methods:
- from USB ↔ UART converter
- using microUSB sockets
- using DC power supply 24V (without the heat sink on the voltage converter system)
- from the programmer to the microcontroller or the circuit
- directly from the DC power supply by providing voltage to the supply pins
- the possibility to unlock the processor using the adjustable generator based on NE555 (you can use any generator)
- 3,3V power derived for pins, so that you can supply external peripherals from 3,3V
- the possibility of service the device by yourself
- the PCB is one-sided
- it does not involve high voltages
List of components you need to create this development kit:
- ZIF 40
- voltage converter based on LM2576T-5
- generator on NE555 with changeable frequency
- temperature sensor DS18B20
- LED bar (10 segments)
- photoresistor RPP111
- voltage divider for setting the voltage from 0 to VCC
- EEPROM 24C04
- USB<-> UART adapter based on MCP2200 with all GPIO lines derived
- microUSB socket with all signals derived
- 5mm RGB diode
- buzzer
- microSD card
- RTC
- double H bridge
- converter for the bus 485 and resistor terminating this bus
- 6 buttons

Attachment to the original thread contains schematic.
Link to original thread (useful attachment) - MuliBlue EvB - czyli uniwersalny zestaw uruchomieniowy dla AVR, PIC oraz MSP