Continue to Site
Follow along with the video below to see how to install our site as a web app on your home screen.
Note: This feature may not be available in some browsers.
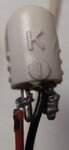
Take a multimeter and check the polarity of the power
Are you sure that the battery capacity has to do with powering up the device properly? I was under the impression that the capacity of the battery simply determines how LONG the battery can last, not how much power it pumps out at any given time.Hi,
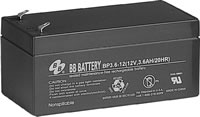
Those batteries seems to be ordinary ones with about 150mA capacity. You need something like Duracell or 2.7Ah rechargeable batteries.
Hi,
Also please check the IR snesor and Remote are compatible to each other.
Can you explain those RED, BLACK and BLUE wires of the power. RED and BLACK is understood what is BLUE for and what should be there for the fouth pin. My Guess the fourth pin should be be again Black.
Are you sure that the battery capacity has to do with powering up the device properly? I was under the impression that the capacity of the battery simply determines how LONG the battery can last, not how much power it pumps out at any given time.