Continue to Site

Welcome to EDAboard.com

Welcome to our site! EDAboard.com is an international Electronics Discussion Forum focused on EDA software, circuits, schematics, books, theory, papers, asic, pld, 8051, DSP, Network, RF, Analog Design, PCB, Service Manuals... and a whole lot more! To participate you need to register. Registration is free. Click here to register now.

magnetic sensor alternative to pressure plate

Status
Not open for further replies.

snivelers

Newbie level 5
Joined
Nov 25, 2015
Messages
8
Helped
0
Reputation
0
Reaction score
0
Trophy points
1
Activity points
174
Trying to put together an indoor quad-copter game for the kids involving three (or maybe more) landing pads that detect when a small, indoor quad-copter lands on them and then takes off.

Each landing pad would light up a ring of leds when landed on and signal an enclosed rf sender, which in turn signals an rf receiver attached to a raspberry PI which acts as the game controller (Various games based such as how quickly you can get from one pad to another with some obstacles in between etc etc). I want the pads to be easily moved and not have any cables coming from them, so something like 2 AA batteries supplying 3 volts on each of them.

The issue I'm having is detecting when the quad-copter - which is only around 20g in weight - lands on a pad.

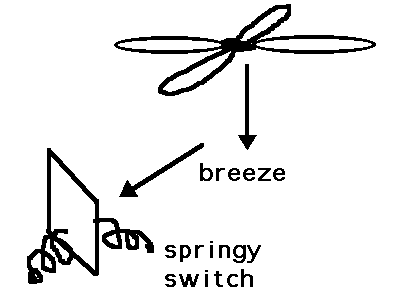
Taking the pressure plate approach, anything sprung I've tried doesn't deflect enough for small weights to get a consistent on or off. Also combination of a very weakly (leaf) sprung landing pad together with a magnet on the underside of the pad and read switch on the base came the closest but still wasn't reliable. Looked at force resistors too but what I've seen isn't sensitive enough. Haven't completely given up on the pressure plate idea; have ordered some thin copper sheet and thinking of using some combination with a plastic lamination pouch that would hopefully reset after being landed on - if anyone has other ideas I'm all ears.

As the quad-copter has 4 motors on each corner and a lipo battery underneath, I'm thinking that it should present a reasonable emf disturbance to be detectable within a few centimeters when it lands. Would something like a Hall sensor be suitable for this? I want to try to keep components/cost to a minimum and ultimately I'm just after a result of on or off.

Thanks in advance.
 

I suggest a capacitive detector, like the sensor in a Theremin. It is so sensitive it will detect objects several inches away. But perhaps it will be less sensitive to a floating object without too much capacitance. Basically it is a high-impedance LC oscillator (use a FET) in which the capacitor is the plate the copter lands on. Your job would be to detect when the frequency of this oscillator drops below a certain threshold. That can be done with some frequency divider chips and a fairly fast Input Capture module in a Microchip PIC microcontroller. Using a microcontroller allows you to easily set and memorize the ideal threshold frequency by providing a calibration mode. That way you can be pretty sloppy about component tolerances and correct for all the sloppiness in the calibration stage. (The micro has built-in non-volatile memory for such calibrations.)
 
Hi,

Post #2 sounds a professional and polished approach.

If the quad-copter actually lands then it will create a little darkness momentarily, so a cruddy way could be to have inverted response LDRs on each pad (signal "off" with light - no quad-copter, "on" when covered - quad-copter has landed).
 

Had a momentary thought early on too about the ldr side but there are a few issues; quad-copter shape is really a thin 'X' and also would like this to work in darkness and the quad-copters I've got for them have led lights underneath.
Agreed about the polished approach for post 2 - thanks Tunelabguy, this has set me off in an interesting direction.
I looked at off the shelf capacitive proximity switches but very industrial and expensive if sourced from the UK. From China a lot cheaper but probably wouldn't get here before Xmas.
So found these two circuits which really interest me :

**broken link removed** and there's a slightly modified version of the same on this youtube video : https://www.youtube.com/watch?v=YxL_jyZcvLU
https://www.ti.com/tool/TIDM-PROXIMITYSENSING

Any opinions on which one to lean towards? I'm a bit unsure if the first one - proximity alarm - would provide a continuous 'on' with the quad-copter landed or a brief pulse.
 

I know little about them, but wonder if RFID tags could be a solution as they are small and used for a similar dynamic. Not sure if any other hardware needed would be too bulky?
 

Thanks for all the responses, including the out of the box thinking from chuckey; not quite what I need for this but storing idea in back of head for other things.
d123 - again an interesting idea using rfid, but like with chuckey's idea, want to avoid getting into modifying the quad-copters for this; it's likely to end up being lent out to the kids primary school and other stuff where other kids will be using it with their own 'copters' and all sorts of flying gizmos. Also, with the really small quad-copters they are very sensitive to anything being added.

Plumbed for going down the MSP430G2 (https://www.ti.com/tool/TIDM-PROXIMITYSENSING) route but break it off into my own minimal board once working. After trying to work out how to adjust the sensitivity (hunting for where to put a variable resistor) and finding the 'C' code, realised I was a bit naive and hadn't noticed the need to program the chip.
So on top of the MSP430G2230IDR chip (8 pin) I've ordered to play with, I've also ordered a Texas Instruments MSP430G2XX Launchpad but note they all seem to be set-up for 14 or 20 pins so may end up ordering another kind of MSP430G2 chip to suit. Haven't ever done chip programming before, did some C many years ago but ok with general programming (Java, Android, Python, Rails), so feel a steep - but interesting - learning curve coming on.

Any advice on the chip programming front that might help or have I got it pretty much covered for starters with getting a launchpad?
 

Hi,

Nice you've decided on a solution that works for your needs. Lack any ability to comment on question about Launchpad or programming, sorry, just know TI (like other programmable chip manufacturers) seem to lay all manner of tools and reference designs out on a silver platter for any person interested, and their forums can be useful for answers too.

When it's up and flying, where giddy children are involved, maybe best to keep an eye to avoid copter-human collisions! :)

Best of luck!
 

Time spent in getting a capacitive solution working will be well spent compared to attempting something mechanical and fiddly to work for such a small weight + the really appealing thing is I can easily re-purpose so much to act as a landing pad.
Health & safety wise covered as much as possible; the quads have basic prop guards plus they each get a set of snazzy safety specs. Thing I'm more concerned about is giddy kiddy A treading on giddy kiddy B's quad-copter and associated Xmas fall out; during the report of such earth shattering violation Dad will be mysteriously absent.

Thanks for everyone's input - I'll put up some images when I get something together.
 

What about breeze sensors around the perimeter of the landing pad?

Air from the propellers is diverted toward the horizontal when landing. Attach a square of paper to a hinge. If you're lucky the force is sufficient to close a switch made from two bare wires close together.

5408522200_1448643935.gif
 

The landing pad I've put together had two rings of leds, blue ring in the middle and green ring on the outer. Nothing sensed on the pad results in inner ring constantly on, outer ring blinking then when something is sensed on the pad both rings blink together.

I went with exactly the same chip as shown in the TI proximity sensing example but just used the launchpad with a normal insulated lead (unshielded) from the P1.4 pin on the launchpad to a small copper square (approx 2cm sq) and it worked a treat using the onboard leds, even with the copper sensor square in the centre of the led rings.

Then put together a little pcb board with two transistors on to power the inner and outer rings of the landing pad leds. Initially kept the msp430g2553 chip on the launchpad and powered the pcb from the launch pad (3.6v) and connected output pins for inner and outer leds to the relevant transistor feeding ones on the pcb and again worked great, could sense something coming onto the landing pad within a few cm's, and detect it leave reliably, no false triggers, led rings showing state fine.

Then moved the chip off the launch pad and onto the pcb (powered from 2 AA batteries - changed flag in C code to indicated battery power), then the fun started. I found that it always triggered even with nothing close to the sensor or even with the sensor completed detached.
Looked further into this and realised with the way I'd arranged the components I might have created ground loop issues on the pcb. It has two rail lines going through the centre which I'd put + and - on that where going under the chip. Tried moving power off the rails but still continuously false triggered.

Got another pcb and placed the chip socket far left with the sensor pin on the left. Only other thing connected on the left side of the chip was the power pin for the chip. Tried the 'star' approach to avoid ground loop and wired all ground points straight back to the battery negative pin.
This defintely improved things going from total false triggers to intermittent ones. Tried various shielding attempts around the sensor cable and the pcb but couldn't improve further. Tried mitigating the false triggers in software by sampling but it doesn't cut it.

Double checked I've wired the chip as per specs with capacitor on + and reset pin with a 47K resistor; it actually performs correctly with the leds etc. it's just the false triggers that are spoiling it. Added some pics to make it clearer.

Don't want to get into creating my own PCB and a ground plane (don't know enough about this stuff) - does anyone have any suggestions to reduce the noise on the existing board that it is generating or something I - very likely - have missed.

Thanks

first_pcb.pngsecond_pcb.pngsecond_with_landing_pad.png
 

Hi there,

Glad you've got it up and running.

Could be lots of things I don't understand, but one avenue to look into is using a Schmitt-trigger buffer device, maybe simulate it to see what it could or couldn't help with first though - maybe you can code that aspect into the msp430g2553 if needed rather than use a separate buffer IC.

Here are links to datasheets so as to see if it could work or not to save you a tiny bit of time:

**broken link removed**

https://www.ti.com/lit/ds/symlink/sn74lvc1g17-q1.pdf

https://www.ti.com/lit/ds/symlink/sn74auc17.pdf

Unrelated, I think it's supposed to be not recommended using the DIL sockets with ICs if you can avoid it (similar to - ideally but not realistically always possible - avoiding use of SIL headers and SIL sockets), unless you really need to keep changing the IC constantly and desoldering would be an inconvenience. I've stopped using them and solder the ICs directly to the board. By memory, they add capacitance, presumably a little additional resistance (and a pinch of inductance?) and no doubt other unwanted aspects (like resistor noise does ) to a circuit/IC.

Anyway... Not sure where LEDs are connected, star ground I imagine (pictures taking long time to load for some reason, sorry, will look again later), but LEDs are noisy little things, so if that were the problem and there's any way of putting them on a diferent supply (or faking one with a regulator), and connecting them through - for example, and may not be a great suggestion - a linear regulator's out and 0V pin and the Vout bypassing caps to create some king of buffer, or putting the IC that triggers falsely behind a linear regulator.

Peering at pictures, a few decoupling - or bypass - (never remember difference) on battery inputs + and - to circuit and on ICs + and - could help.

Can't think of any other probably wrong suggestions for now.
 

Thanks for picking out all the docs.
Seemingly the Schmitt-trigger buffer is only active on the chip for pins set as input and the way pin 1.4 is used as an electrode can't use it.

Towards providing something similar in the code. I added some trigger threshold variables; SEQUENCED_TRIGGERS_INDICATING_LANDING and SEQUENCED_TRIGGERS_INDICATING_ABSCENCE.
The while loop firstly does a sample on the electrode and then does the led blinking in line, and to provide the blinking there’s a 2 second sleep. So if I set SEQUENCED_TRIGGERS_INDICATING_LANDING to 4 consecutive triggers then it takes 8 seconds to determine the presence of flying gizmo. Actually, even with this, with the chip on the pcb still get the odd false result.

There may be some mileage though in reducing the sleep time and increasing the consecutive trigger threshold – will play around with that later.

Unfortunately need to have DIL sockets in place as I’m frequently pulling the chip off and changing the code to adapt, but can see how easily such things as the sockets can play a part. I found that on the pcb the board and even the batteries become proximity sensors, so if your put your hand within a few millimeters of the batteries - it triggers.

Good point about the Led’s potentially being an issue, so tried ruling that one out by connecting a resistor and led in place of each led ring; didn’t though make a difference.

Tried moving the chip onto a separate solderless breadboard and jumpering over to the first pcb board (I had originally put pins on that pcb so the Launchpad could connect easily) to use the transistors and led connectors on it. No improvement and possibly worse because of all the increased copper area. moving_chip_away_form_pcb.png

Finally tried using the launch pad with battery power. I was running short on jumper cables and used the solderless breadboard as a join point. It was a lot better but using the breadboard I think introduced the odd false result. launch_pad_on_battery.png

Balancing things with not wanting to add any more IC components (cost) or create a custom pcb and rapidly approaching Xmas (only just started to look at the other landing pads and associated ‘bling’) have opted as fall back to order another Launchpad and for the meantime just sense take off and landing on two of the landing pads.

Still want to get this working though on the pcb alone. You mentioned ‘decoupling – or bypass –‘ which looks worth trying. I’m presuming this involves capacitors between ground and whatever is outputting positive, so would I have this attempt covered if I put capacitors in the following places :

Between positive and negative as it comes onto the pcb.
Between negative and each output pin used for switching the led feeding transistors.
Between negative and positive take off pins for led rings.

Any other places worth putting capacitors on?
 

Hi there,

Hope all is well. Cough, cough, my bespoke and proven (won't say "bijoux" or "cosy" as the lie doesn't invove selling a house) experience would suggest I really don't know, sorry.

Capacitors across the power supply input points are always a good idea, likewise across any IC + and - pins. The LED idea could be worth trying, or not, won't know until attempted.

Don't know about you, I usually find that the more complicated the solution becomes the more probable that KISS is needed to be remembered and the Occam's Razor or whatever term is for "so obvious and piddling you can't see it". Maybe before driving yourself crazy (that's what happens to me - 10 additional unnecessary subcircuits later then I realise it was e.g. only a blown capacitor, etc. :))))) )

I'd look at the datasheet for the thing you are using and any related information about the implications of leaving IC inputs (not usually outputs) floating or that avenue of thought. If anything in the vicinity of that board is false triggering, sounds possibly like one reason may be floating input syndrome, could be very wrong. I'm sure I'm wrong, but that sounds like even just blow on the IC and it false triggers, that can be something to do with how it is connected or parts of it aren't and need to be or need to be configured a specific way, like CMOS ICs physically need unused inputs "tied to an appropriate logic level", I don't know how you do with a PIC type of device, presumably setting I/Os as appropriate.

Sorry I can't be of more help.

- - - Updated - - -

Hi, or just try putting circuit in (shielded) box and then test for false triggers...?

- - - Updated - - -

Hi, or just put circuit in (shielded) box then test operation for false triggering...?
 

You've been a great help at giving directions to try, a lot of this anyway seems to be ruling something out.
I usually lean towards the simple ideas, but feel I flogged the apparently simple - really mechanical contact - ideas early on (Came close but no cigar with the fine leaf springs pressure plate). I think the killer idea is one that's simple, works reliably without the need for complex/fine tolerance mechanical work.
Before I started this I'd never done chip programming before and have to say I'm a bit hooked now since - depending on what I'm trying - drastically reduces the components on the board. I've managed though to try something that is sooo sensitive with my first such project, so it's more of a learning curve.

Did an admittedly basic attempt at the shielding before but appeared to make it worse; seemed that the box began to act as a sensor even though nothing conductive was touching the box and the electrode was outside of it.

Good point again about unused inputs or outputs, set me off on that and found this post : https://electronics.stackexchange.c...ie-to-gnd-or-use-software-to-prevent-floating . I think the current setup is like number 3 in that post and "This is the worst case scenario for EMI, because each pin forms a tiny stub of an antenna".
I'm going to concentrate on the landing pads and the led 'bling' for the next few evenings and come back to the pcb board. I'll then try - apart from capacitor decoupling - making unused pins inputs and tying them to ground. It's going to get messy maintaining the star ground approach with a 20 pin IC...
 

I've managed though to try something that is sooo sensitive with my first such project, so it's more of a learning curve.

(...getting hooked on programming and reduces component count...)

I'll then try - apart from capacitor decoupling - making unused pins inputs and tying them to ground. It's going to get messy maintaining the star ground approach with a 20 pin IC...

Hi - my biggest circuit peeve was a "simple" AC/DC transformer based power supply that was going to be "quick and easy" to add it to another circuit that took 2 weeks to start and complete, and found it took months of reading and mistakes... Hadn't thought that power is a rather complex issue, like any other circuit.

I just did an analog "automated" greenhouse circuit, it's not great, but I like it, and it works well enough as a prototype, but it's the end of the line for that project - about 20 ICs (26 including sensors and other) for 6 automated funcions, and that's excluding external machinery stuff, so now I'm reading a PIC datasheet to "know the enemy", as no matter how much I like analog circuits, can't justify wasting good op amps and sensors on a 1950's jerky clockwork toy, and have little inclination to solder endless ICs to something the size of the dining room table, where 2 20 pin PICs can do most of the work! :) Next year I may be able to do some PIC coding at this rate! I'm glad you're enjoying yourself that way.

Ground tying shouldn't be messy, I guess it should be like CD4000 family tying to +V or 0V: lump relevant pins together at IC and could be only 1 resistor to ground (you said ground) - why parallel and waste components?, and a track or cable from there to the single ground meeting point you have - I do that with unused inputs on CD4082 (4 input AND gate), and just use a 1K, seems to work for that IC.

I'll read that link you posted now, thanks.

Good luck with hunting source of nuisance triggering down, really.
 
Last edited:

That greenhouse circuit sounds like a monster but I guess, like I've found with this one, its experience that you can apply elsewhere; never appreciated the issues of circuit noise until tackling this. Definitely been bitten by the microprocessor coding as it gives you the ability to tweak things to avoid adding lots of components; although it seems the board still manages to grow mainly because there’s all those pins that I hate being idle.

On top of the pad in the previous pics, I also made another four landing pads in two different sizes to give easier and harder options (Also attempted to make them look a bit sci-fi/star warsy etc.) – loads of LED bling. I decided to create four of the circuit boards with 4 outputs on each for LED’s.

challenging1.jpgchallenging2.jpgcircuit_board.jpgmediumish.jpgobstacle_mayhem.jpg

Did as you said with a single 1K resistor going to ground to tie down the inputs. Put capacitors on the supply and for good measure across the led take offs although not so sure the latter made a difference. Also put the cable going from the PCB to the copper electrode plate in some flexible conduit to make sure it was spaced away from any cables; again not so sure how much of difference that made.

I found even with the LEDs apparently off during the electrode sampling stage, I could still get plenty of triggers, as if something residual in the LED’s rings – perhaps electromagnetic related – was causing false triggers. I reduced the amount of time the LED’s were on for, and extended the time they were off leading up to an electrode sample which seems to have provided the best results.

Totally agree with how noisy LED’s can be. I could probably eradicate the false triggers by a combination of better/shorter cable routing inside the cases for the landing pads and also separating out the power for the LED side using optocouplers; still need control of LED’s from the same microprocessor as I need to make sure they’re off during the sampling stage. Will tackle that another time, for the moment kids are having a lot of fun with this stuff.
 

Hi,

That all looks very nice, and lots of fun to play with! That's genuinely very nice for a home-made toy, good for you. Have you tried shielding any of those cables, and doing twisted pairs where possible? Probably won't make any difference either, but just wanted to mention it.

Also not likely at all, but came to mind a while ago - is the interfence coming from something not related to the circuit, like Mobile phones or microwave cookers or TV remotes? Doubt it.

Thanks for the update. I bet your children like you a lot, and with good reason, glad they're enjoying it. Hope you're having a great festive season.
 

Status
Not open for further replies.

Part and Inventory Search

Welcome to EDABoard.com

Sponsor

Back
Top