GuiRitter
Junior Member level 1
Hi everyone.
Finally I was able to finish the clone. I based mine on this design:
**broken link removed**
I've attached my design with a few modifications, which have been discussed in this forum, on my previous thread. Also attached is the PCB layout I created from scratch, using Proteus ISIS and ARES. My friend made the board using screen printing (serigraphy), we used iron(III) chloride to etch the copper, a certain tool that I don't know the name to punch the holes, and then I soldered the components. Some of those were scavenged.
The ICSP provides power to the target, drawing from the USB. At first, I wanted to wait to see what would be the best way to make the ICSP connector. Since I was excited to see it working, I ended up soldering pieces of wire. Some kludging was necessary elsewhere, since the inductor's leads were thicker than expected, I lacked the proper tools to make the holes for the USB connector, and the PIC's socket got two broken pins.
When I connected it to my netbook running Windows 7, it was promptly recognized and the driver (?) was installed. The PICkit2 software also recognized the circuit. Then I built a test circuit, on a protoboard, to test the target PIC, a 16F877A. After a few struggling because I was dumb enough to forget two wires, it worked like a charm.
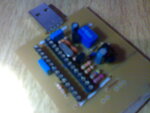
Also attached a photo of the almost finished product. But it's just a reference, because the quality is really crappy. If requested and if I find a better camera, I'll shoot another photo.
Tomorrow, I will make a program to print on a LCD screen to test it better. Until then, I fully recommend this design. Thanks again for those who helped me on my previous thread.
Update: LCD didn't worked, but the program also flashed a LED, which worked, so it could be the LCD's fault or my wiring. I shall look into that later, but not soon.
Attachments:
Schematic: View attachment esquemático.PDF
Layout: View attachment layout.PDF
Board lacking PIC and ICSP:

Last edited: