Continue to Site

Welcome to EDAboard.com

Welcome to our site! EDAboard.com is an international Electronics Discussion Forum focused on EDA software, circuits, schematics, books, theory, papers, asic, pld, 8051, DSP, Network, RF, Analog Design, PCB, Service Manuals... and a whole lot more! To participate you need to register. Registration is free. Click here to register now.

Finding oven fuse and removing the internal speaker

Status
Not open for further replies.

no_spark

Newbie level 4
Joined
Jan 6, 2017
Messages
7
Helped
0
Reputation
0
Reaction score
0
Trophy points
1
Activity points
63
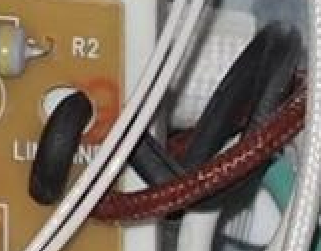
I have a small Kitchenaid oven, the KCO275. It was designed with a very loud speaker that sounds when you do absolutely anything. I decided to try and silence it. After getting inside I was unsure where the speaker was, so I plugged it in to listen. The control board shifted and touched the frame, I believe this caused a short as I could hear a fuse go off and the machine will no longer power on.

Now I need to find the fuse, replace it. Then find the speaker and remove it.

https://imgur.com/XJqOrLG

oven.jpg
 

The speaker is probably BZ for buzzer.

No obvious sign of a fuse, nor Ampere value for a fuse. No obvious burn marks.

There is a wire which is not entirely a uniform color. It looks as though it might be charred. If so then it might be a blown fusible link (substitute for a fuse). Examine it closely.

Do the partially hidden words say LINK or LINE or GND?

4381485100_1483689502.png
 

New picture added. The wire does not appear charred, the dis-coloration on the black input wire seems like a white residue from manufacturing. There was no smell what-so-ever when it clicked, I feel like the sound came from near the power cord entrance but really can't be sure.

Using a meter I get continuity from the Black White and Green wires to the respective plug on the end of the cord.

oven2.jpg
 

"BZ" is the buzzer (loudspeaker), the easiest way to make it quieter is to place some tape over the hole in it. The tape doesn't have to be very thick, the body and hole size determine how loud it is (they form a resonant chamber) so anything that detunes it will cause a dramatic drop in volume.

Unless it uses a capacitive dropper power supply, there must be some components we cant see. If it IS a capacitive dropper, I would guess R2 and C1 are the dropping components and the small 8-pin IC is a switching voltage regulator. L1 looks like it could be the storage inductor. Can you tell us what the number is on the IC (U1), I think it says Viper12A but the picture isn't clear enough to be sure.

A word of caution, if I'm right about the power supply, it does not provide any isolation from the incoming AC wires and the product is only safe to the user because the live parts are out of reach. With the case open, even wires that appear to be low voltage could have more than 300V on them with respect to ground so they are potentially extremely dangerous.

Brian.
 

I certainly moved to fast, covering the speaker would have been an ideal solution. Will make sure to completely re-assemble before I power back on.

IC(U1) words:

VIPer12A
4A0415

oven7.jpg

- - - Updated - - -

Back shots of the boards:

oven4.jpgoven3.jpg
 

L1 is not the storage inductor, instead VIPer12 seems to be operated in a kind of buck converter circuit with L2 and/or L3 as storage inductor.

The non-isolated power supply involves a high risk that the ground short caused permanent damage either of the power supply or the chip-on-board microcontroller. In the latter case there's no chance for repair.
 

You are right, it is a strange configuration. The AC passes through the 47 Ohm resistor (R2) then two series diodes (D1 & D2) to a Pi filter made of L1 and the two brown electrolytics. From there is goes directly to the drain of the Viper12. That means the output is taken from the source pins and the feedback is 'lifted' above ground as it should never be more than 1V above source voltage on that device. I've never seen a Viper used as a high side regulator before.

Regardless of the schematic, the relay coils work at 24V so that is the voltage it must produce somehow. I imagine the feed to the controller board is 5V or 3.3V as it doesn't seem to have a regulator of it's own.

No_spark, with extreme care plase refit the circuit boards (so they are held rigid) and put the plugs back in their sockets. As FvM and I point out, this kind of power supply is exceptionally dangerous so touch NOTHING while the appliance is plugged in. You need a voltmeter to check further. Plug the oven in to the wall socket and switch it on.

1. Set the meter to the next voltage range higher than 250V DC.
2. Place the black probe on the solder joint at the end of the WHITE wire where marked "Neutral"
3. Place the red probe on the wire leaving L1 at the end nearest U1.

Tell us what you measure.

Brian.
 

Power OFF:

Just to check the connections.

oven9.jpg

Power ON:

The needle shows no movement at all.

oven10.jpg
 

Well, this is embarrassing. Always check the most obvious easy thing first.

The outlet this is on has a GFCI built into it. This outlet is right by the unit so the sound appeared to come from the power board. I re-set the circuit and now the unit is powering on.

To avoid soldering, I will just block the speaker as suggested and carefully re-assemble it all together.

Apparently I am too dumb to electrocute myself, even when I am trying.
 

Don't worry, you're not the first to do it !

Interesting link FvM, the circuit appears to be very similar to that used in the oven. I'm wiser - thank you!

Brian.
 

Status
Not open for further replies.

Part and Inventory Search

Welcome to EDABoard.com

Sponsor

Back
Top