Continue to Site

Welcome to EDAboard.com

Welcome to our site! EDAboard.com is an international Electronics Discussion Forum focused on EDA software, circuits, schematics, books, theory, papers, asic, pld, 8051, DSP, Network, RF, Analog Design, PCB, Service Manuals... and a whole lot more! To participate you need to register. Registration is free. Click here to register now.

High gain microphone pre amplifier circuit, where would the bottlenecks be?

Status
Not open for further replies.

Plecto

Full Member level 5
Joined
Jan 4, 2012
Messages
315
Helped
1
Reputation
2
Reaction score
1
Trophy points
1,298
Activity points
4,979
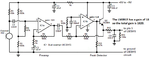
Hi. I'm making a sound level alarm, a simple device that will turn on a light if the sound level is above a certain level. For this I would like it to have the ability to be really sensitive, but I'm not sure how to achieve that. Right now I'm using one of those cheap through hole electret mics with an LMV358 op-amp, but there's a limit to how much gain I can have before noise becomes a serious issue. Perhaps I can increase the gain if I go for a really low noise op-amp, but what can I really expect from one of these electret mics anyway? Any ideas?
 

Hi,

show us your circuit.

Klaus
 

Not sure if there's any point in showing the circuit I already have as I would redesign it. Not even sure I have the circuit as the application I found was made like two years ago. I'm asking in a general sense, not specific to any single design.
 

Cheap electrets are not particulary good in terms of noise or frequency response but the LMV358 isn't a low noise amp either. If you are trying for very high gain, unless you are very careful, you risk instability. You might get better performance from a two-stage amplifier with each half running at lower gain. Other than that, all you can do is reduce noise by filtering out any unwanted frequencies (LPF, BPF, HPF etc) so the noise within those frequencies is reduced and not part of the total.

Probably a better solution would be single stage low noise pre-amp ahead of the LMV358.

Brian.
 

Hi,

general answers:

* use low noise microphone
* use low noise opamps (single stage as long as it does not limit upper signal range)
* select parts for low noise (Rs = low value, metal film, Cs = foil, clean power supply = filters...)
* use bandpass filters to focus on the frequency range you want.
* use low pass filter at the signal output.
* shielded cables
* emv filters
* shielding case
* ...

Klaus
 

I agree that the LMV358 is VERY noisy, look at its datasheet. Use a low noise opamp designed for audio instead.
Have you 'scope'd or listened to the output of your circuit? It might have 50Hz or 60Hz mains hum caused by poor wiring and not have rumbling or hiss caused by the mic or the opamp.

I have a sound level meter in my living room that is extremely sensitive. It uses the electret mic from a cheap cell phone and an ordinary opamp, not a low noise audio opamp. If there is no sound from anything then it shows me breathing many meters away. When I hold my breath then it shows the quietness of no sounds that you want.
 

Thanks for some great answers. I think I have some low-noise op-amps that I can use in my next design. I'll also do some careful filter calculations to minimize the bandwidth needed as much as possible. I did some adjustments to the old circuit I had laying around (with the LMV358) increasing it's gain to 4255 which seems to work just fine, but I guess it would be possible to have a gain much higher than that with a more proper design.

I have a sound level meter in my living room that is extremely sensitive. It uses the electret mic from a cheap cell phone and an ordinary opamp, not a low noise audio opamp. If there is no sound from anything then it shows me breathing many meters away. When I hold my breath then it shows the quietness of no sounds that you want.

That's what I want! What other considerations did you do to make it that sensitive?
 
Last edited:

Hi,

...Gain of 4255...

The LMV358 has a GBW of 1MHz.

--> with a gain of 4255 the upper cutoff frequency is 235Hz.

this LowPassFilter also attenuates the noise above 235 Hz. No wonder it is low noise now. ;-)


Klaus
 

Maybe your electret mic is connected backwards? Or maybe your gain of 4255 might be with a gain of 65 in each of the two opamps in the LMV358? With a gain of 65 the high end is cut above about 20kHz.
Here is my electret mic preamp and peak detector:
 

Attachments

  • preamp for electret mic.png
    preamp for electret mic.png
    27.8 KB · Views: 151

I didn't even consider the GBP, I'm going to become a very sloppy engineer, no wonder increasing the gain didn't have the result I was hoping for :(

Thanks for showing me your circuit, Audioguru, I will take some inspiration from it if I can't get the desired result I want from my current circuit.

I got another idea though, what about using a LM393 comparator instead? All I need is a HIGH or LOW so a comparator circuit would make things rather easy. I could use a trim pot to finely tune it to compensate for the offset voltage so that I can reach the ultra sensitivity I'm looking for, or am I missing something?
 

Hi,

I got another idea though, what about using a LM393 comparator instead?
You will need both:
* amplifier with filters
* comparator

Klaus
 

Why would I need an amplifier?
 

Hi,

Why would I need an amplifier?

Several problems:

* lets say you want an output voltage of 5V and a gain of 1000 this means a comparator threshold voltage of 2.5mV. How do you ensure clean switching at this level?

Additionally:
* even a comparator has limited open loop gain ... and thereofre limited frequency response
* how do you include the filters

Usually one wants a "clean" output signal with a "minimum" specified timing (but I don´t know about your requirements),
* therefore I assume you don´t want to switch it ON after everi microsecond of (false?) signal (EMV caused by switching ON a refrigerator in the next room)
--> use some miliseconds "switch ON delay" to "verify" the trigger signal
* and you may not want to switch it OFF after some microseconds (too less time to see a LED flicker, or for a relay to switch ON)
--> so you may want a "switch OFF delay" of some milliseconds.

...maybe a comparator with hysteresis?

***
The shown circuit reacts on positive signals only....
Often this is good for audio signals (they are somehow symmetric)
But maybe you want negative signals too.. a diode solution is not possible with signals in the range of mV.

Klaus
 

Why would I need an amplifier?

Right. You may need several!

Also you may need to filter the top and bottom ends (instead of 20K, start at 15K and instead of 20Hz, start at 200!)

Instead of finding one person who can jump 100m, you may find three person who each can jump 50m!! That's far easier.

Also put the filters (judiciously) between the amplifier stages. Your music may not sound so nice but the noise will be surely down.
 

In my circuit, the preamp has a gain of 101 (then its opamp has a cutoff frequency of 18kHz) and the peak detector has a gain of 1.8 so the total gain is 181.8. The peak detector provides a smoothed DC output instead of a flickering AC output without it. It also holds its output voltage 30ms for shorter duration inputs. Then it feeds the LM3915 LED driver. Guess what? The LM3915 has 10 comparators that drive the LEDs with regulated current and its input has a high impedance buffer. The LM3915 also has a programmable voltage reference for the comparators. The reference voltage is 1.25V so that the input offset voltage error of the comparators does not affect it and the effective gain of the LM3915 is 10 for the most sensitive output.

My circuit does not detect when the refrigerator turns on and shows all audible frequencies because it has no filters. If you want it to detect negative signals and positive signals then change its peak detector to be fullwave, but then the peak detector must have an additional negative supply.
 

Okay, so here is my current circuit:

2e5o0ms.jpg


Those values that are not given are either irrelevant or not present on the actual board.

I shorted the mic to ground to see what noise the circuit itself is generating which proved to be just about undetectable on my scope. Removing the short revealed the 'noise' that's coming from the mic itself, but I'm not sure of what the source of it is since it seems to be steady even though the room I'm sitting in is close to dead quiet. I guess the microphone itself is generating random noise?
 

I see a few problems on your schematic:
1) The power supply has a half-wave rectifier which causes ripple. Use a full wave bridge then the ripple frequency is doubled allowing the filter capacitor to filter much better and/or be smaller.
2) Your opamp is in an inverting circuit with a very low input resistance of only 1k which kills most of the output level from the mic. Instead the opamp should be in a non-inverting circuit like mine in post #9 with an input resistance of at least 27k. Mine is 97k.
3) I do not see how the opamp is powered.
4) The TLE2142 is a dual opamp, how will you use or disable its second opamp? Maybe you should use a TLE2141 single opamp instead?
 

Are you powering up the opamp and microphone directly from a microcontroller port....why would you want to do that?

You have a resistor R26 in series with the regulator output....again, why?
 

Hi,

It seems to be an EAGLE schematic.

You make it unnecessary difficult:
* Why don´t you connect the signals by using "net" command and connect one part/pin with the other part/pin? Then it automatically creates the connection "dots" and everybody can see if it is a crossing of two independend signals or "one" signal.
* Why don´t you use the "value" command?
* avoid crossings
* avoid wires crossing a symbol.
* use VCC (or similar) symbol.

schematic issues:
* T1 base current is not limited.
* LED1 won´t work
* Why R26?
* Why R5, R11, R14, R15 in a string?
* your transformer primary needs a second connection.
* don´t let PB4 float

Klaus
 

I see that I should have stripped down the schematic and made it more easily readable, my apologizes. The schematic is purely made for board layout purposes.

I see a few problems on your schematic:
1) The power supply has a half-wave rectifier which causes ripple. Use a full wave bridge then the ripple frequency is doubled allowing the filter capacitor to filter much better and/or be smaller.
2) Your opamp is in an inverting circuit with a very low input resistance of only 1k which kills most of the output level from the mic. Instead the opamp should be in a non-inverting circuit like mine in post #9 with an input resistance of at least 27k. Mine is 97k.
3) I do not see how the opamp is powered.
4) The TLE2142 is a dual opamp, how will you use or disable its second opamp? Maybe you should use a TLE2141 single opamp instead?

1) I guess that would be a price vs. size consideration only? Price of a bridge rectifier vs. a single diode, and the cost/size of the capacitor?

2) In an inverting configuration, the feedback resistor becomes a part of the total input resistance, right? The input resistance of the TLE2142 is 70Mohm which dwarfs the gain configuration resistors.

4) Does it matter? Are you thinking of just the extra current draw, or perhaps crossover noise?

You have a resistor R26 in series with the regulator output....again, why?

R26 and C1 forms a high-pass filter that filters anything above 16hz so my thinking was to reduce any ripple left by the regulator as well as both supply and regulator generated noise.

Hi,

It seems to be an EAGLE schematic.

You make it unnecessary difficult:
* Why don´t you connect the signals by using "net" command and connect one part/pin with the other part/pin? Then it automatically creates the connection "dots" and everybody can see if it is a crossing of two independend signals or "one" signal.
* Why don´t you use the "value" command?
* avoid crossings
* avoid wires crossing a symbol.
* use VCC (or similar) symbol.

I haven't used those functions before, I will from now on, thank you :)
 

Status
Not open for further replies.

Similar threads

Part and Inventory Search

Welcome to EDABoard.com

Sponsor

Back
Top