silvio
Advanced Member level 3
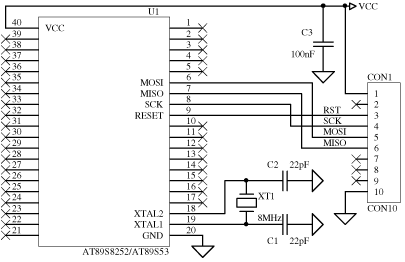
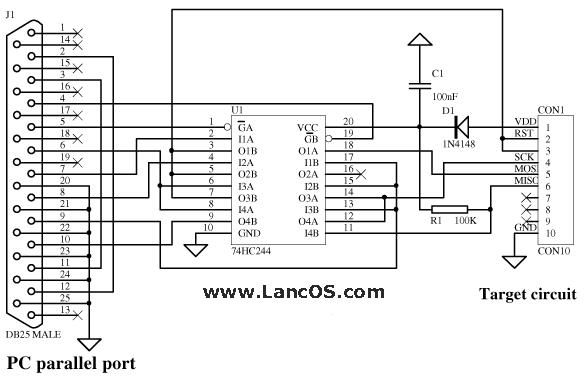
at89c2051 prog pcb
Hi pkedvessy,
Set SPP mode in BIOS for parallel port.
In XP force WIN95 compatibility mode for program.
It should work. I test the harware in 5 different PC with different frequency.
If the byte of the first address is different from 02H then you've a problem.
Hi pkedvessy,
Set SPP mode in BIOS for parallel port.
In XP force WIN95 compatibility mode for program.
It should work. I test the harware in 5 different PC with different frequency.
If the byte of the first address is different from 02H then you've a problem.